Sound Modifier
Before using this modifier for the first time please read the section 'Using the Sound Modifier' below.
Note: this modifier doesn't actually play the sound file! This is due to the way Cinema 4D implements sound playback. To play the sound you must add a sound track to the timeline window; full details are contained in the C4D reference documentation.
Interface
This modifier has the following tabs and sections:
For the 'Groups Affected' and 'Falloff' tabs, and for the buttons at the bottom of the interface, please see the 'Common interface elements' page.
Important: for particle groups, please see the note 'Limitation with particle groups' at the end of this page.
Parameters
Object tab
General quicktab
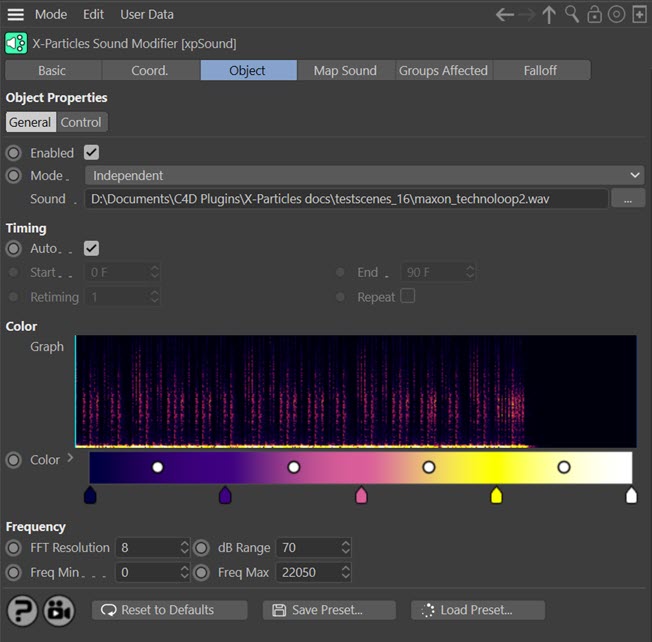
Enabled
Uncheck this switch to disable the modifier.
Mode
Independent [default setting]
In this mode, the modifier will work in the same way as a standard Cinema 4D particle modifier: particles will be affected if they come into the field of effect of the modifier. X-Particle Actions have no effect on the modifier in this mode.
Action-Controlled
In this mode, the modifier will only act on a particle when told to do so by an Action. Until that point, the particle will not be affected, but once activated for a particular particle, the modifier will continue to influence it as long as it is in the field of effect of the modifier. The modifier's effect on a particle can be halted by means of another Action, if desired.
Important: this modifier can affect particle emission and also change particles during the animation. Activating this modifier to work on a specific particle will only have an effect if 'Birth Only' in the mapping tab is unchecked.
Sound
The sound file to use. Click the button with three dots to load a sound file, which must be in .wav format.
Timing section
This section controls the mapping of the sound file time onto the particles.
Note: the controls in this section do NOT affect the actual audio playing of the sound file. Remember that this modifier does not generate an audible sound, Cinema controls this separately. If you want the sound to loop in the same way as the modifier, you will have to set this up manually.
Auto
If this switch is checked, the modifier uses the sound in time with the scene timeline. 'Auto' must be unchecked for the following settings to become available.
Start, End
These are time values which control when on the scene timeline the audio is mapped to the particles. For example, if 'Start' is zero and 'End' is three seconds, the audio file will play for three seconds and then stop. (This is influenced by the 'Retiming' value, see below.)
Retiming
This enables the audio's timing to be changed. For example, suppose 'Start' is zero and 'End' is three seconds. With 'Retiming' at the default value of 1, the audio file will play for three seconds and then stop. You can see that the cyan bar in the graph stops at a specific point. if 'Retiming' is increased to 2, the audio file will still only play for three seconds, but it will play twice as fast, as you can see from the position of the cyan bar.
Repeat
Checking this switch will loop the sound file. So if you have set the 'Start' to zero and the 'End' to three seconds, the sound file will run for three seconds then loop back to the beginning.
Color
Graph
The graph is a representation of the complete sound file. It is a graph of frequency intensity (on the vertical or Y axis) over time (on the horizontal or X axis). The frequency ranges from the minimum frequency at the bottom (i.e. bass frequencies) to the maximum frequency at the top. This range (minimum to maximum) can be changed by adjusting the 'Freq Min' and 'Freq Max' settings (see below).
The cyan vertical line on the graph is the current time in the sound file.
Color
This is the color gradient used for the graph. It is only used for the graph colour, so you can change it to anything you like without affecting the output. The colour used depends on the intensity (amplitude) of each frequency, low amplitudes using the colour on the left of the gradient and high amplitudes the colours to the right.
Frequency section
This section controls how the frequencies in the sound are analysed. It uses a process called Fast Fourier Transform (FFT) to do this; this is a complex subject but you don't need to know how it works to use this modifier! If you are interested much more detail can be found on the net, for example see https://en.wikipedia.org/wiki/Fast_Fourier_transform
FFT Resolution
This controls how many discrete chunks (FFT bins) the frequency range is split into. Lower values give a coarser result. For example, the above screenshot shows the graph with an FFT resolution of 8. If that is reduced to 3, this is the result:
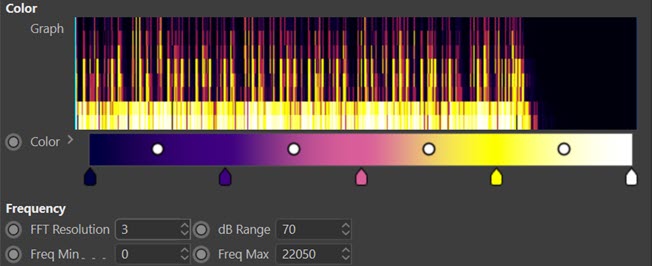
You can see that the lower resolution has resulted in a much smaller number of FFT bins. This will affect the degree of control the modifier can exert over the particles.
Be careful when increasing this value. If you increase it too much the time taken for the calculation will increase greatly and it may even appear that Cinema has frozen. If that happens, wait until the calculation finishes and reduce this value.
However, if you have a very narrow frequency range (as determined by the 'Freq Min' and 'Freq Max' settings) you will need to increase the FFT resolution otherwise it will not have sufficient frequency resolution. However, increasing the frequency resolution reduces the time resolution so you end up with a slower calculation (needs a bigger chunk of the sound) and changes in the audio over time become smeared together.
dB Range
The audio intensity is converted into decibels (dB). Reducing this value will start to remove low-amplitude sound and you will see the colours in the graph move towards the left hand side of the gradient. Lower it too much and the frequency graph may become almost black (with the default colours) and the modifier will have little or no effect. If you increase this value, more low amplitude sound is used and the effect is greater.
Freq Min, Freq Max
These values control the frequency range used. Increasing 'Freq Min' will cut out lower frequencies, increasing 'Freq Max' will bring in higher ones. Whether you need to change these values will depend on the nature of the sound file. However, note that these values are used after the FFT has been applied, so if the range is narrow you may need to increase the FFT resolution, as explained above.
Control quicktab
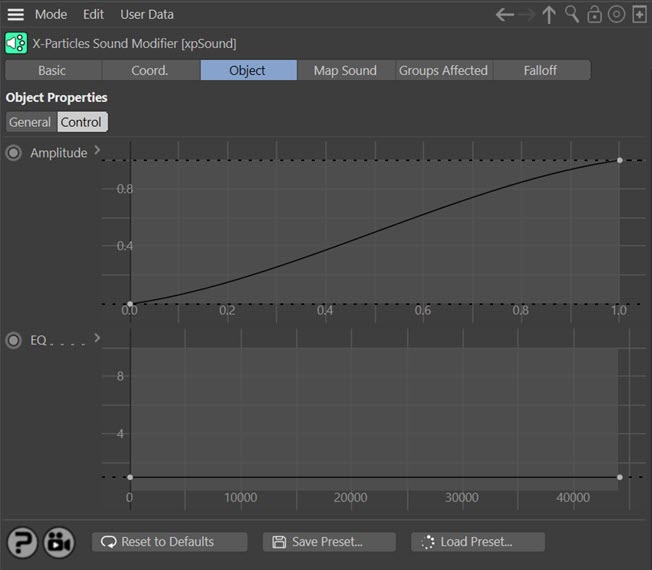
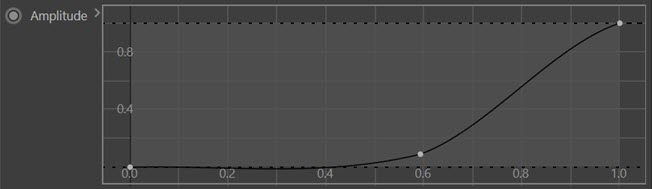
Amplitude
This spline control enables you to map the amplitude values returned from the FFT. You can think of it as acting like an audio filter. For example, this spline would ignore the effect of any low volume sound:
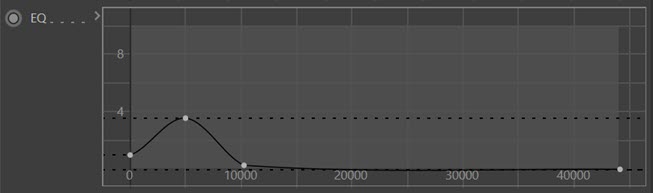
EQ
This is the same as the 'Amplitude' spline but for frequencies rather than amplitude. This spline would boost the effect of bass frequencies and ignore any higher ones:
Map Sound tab
This tab is initially empty, but you can map various particle data items to the sound parameters. Click the 'Add' button to add a map. This interface is then shown:
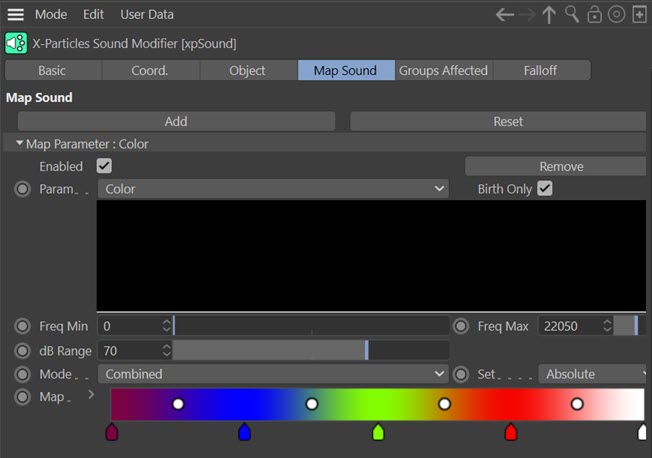
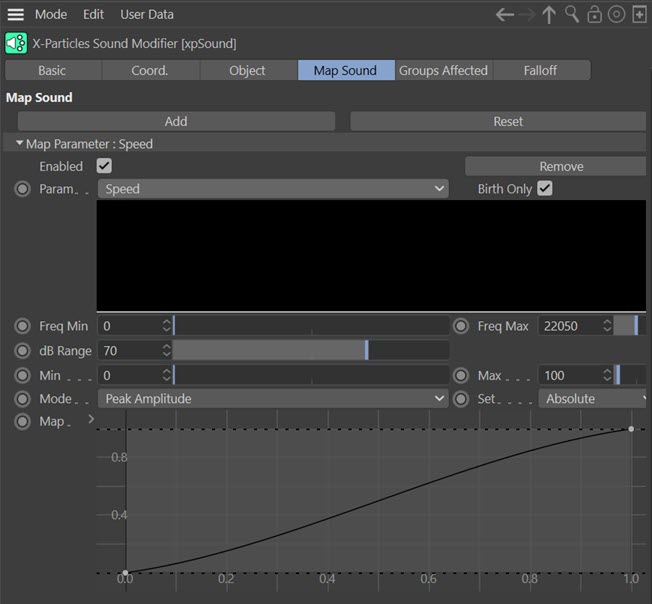
This is the default map, but most others use a spline to control the mapping rather than a gradient, such as the Speed map:
Add
Click this button to add a map.
Reset
Click this button to remove all maps. You will be asked to confirm this before the maps are deleted.
Enabled
Uncheck this switch to disable the map. This is convenient for testing combinations of maps since you can then turn maps on and off to see what difference they make.
Remove
Click this button to remove this map (but leave all others intact).
Param
The particle or emitter parameter to map. The options are:
| Parameter | Comment |
|---|---|
| Color | The particle colour |
| Custom | A custom data item added by the user |
| Emission | The emission rate (birthrate) of any emitter affected by this modifier |
| Fire | The particle fire value |
| Fuel | The particle fuel value |
| Mass | The particle mass |
| Radius | The particle radius |
| Smoke | The particle smoke value |
| Speed | The particle speed |
| Temperature | The particle temperature value |
| Velocity.x | The X axis component of its velocity (not the speed but the normalised direction of the particle) |
| Velocity.y | The Y axis component of its velocity (not the speed but the normalised direction of the particle) |
| Velocity.z | The Z axis component of its velocity (not the speed but the normalised direction of the particle) |
Birth Only
If this switch is checked, the particle parameters will only be set when they are first created. If it is unchecked, the parameters will also be changed during playback, as with most other modifiers. This is not available if 'Param' is set to ''Emission'.
Freq Min, Freq Max
When using 'Mode' set to 'Peak Frequency' (or to 'Combined' for Color maps only) this is the frequency range used to map the parameter. For example, if using a Color map (see screenshot above) when the peak frequency during playback approaches the 'Freq Max' value the particle colour is white; when it approaches the 'Freq Min' value, it is a dark red.
Altering these values will change the spread of values along the colour gradient or the spline control.
dB Range
This is the same as for the 'Freq Min' and 'Freq Max' settings but for use when 'Mode' is set to 'Peak Amplitude' (or to 'Combined' for Color maps only). It is the range of amplitudes used to map the parameter to the colour gradient or spline. The minimum value is always zero, so if this setting has a value of 70, the actual range is 0 to 70.
If the peak amplitude in the sound file during playback is zero, the particle parameter will be mapped to the left-hand end of the colour gradient or the leftmost point in the control spline. If the peak amplitude reaches or exceeds the value in this setting, the particle parameter will be mapped to the right-hand end of the colour gradient or the rightmost point in the control spline.
Mode
The mapping mode to use. There are three options:
Combined
This uses a combination of the other two options. It is only available for Color maps.
Peak Amplitude
The particle parameter (e.g. colour, speed, etc.) depends on the peak amplitude in the sound file at the time of playback. The range of amplitudes used is controlled by the 'db Range' setting.
Peak Frequency
The particle parameter (e.g. colour, speed, etc.) depends on the peak frequency in the sound file at the time of playback. The range of frequencies used is controlled by the 'Freq Min' and 'Freq Max' settings.
Set
This drop-down menu determines how the calculated mapped value is used. It has four options:
Absolute
The calculated value is used without further change.
Add
The calculated value is added to the current parameter value.
Multiply
The calculated value is multiplied by the current parameter value.
Subtract
The calculated value is subtracted from the current parameter value.
Map
This can be either:
A colour gradient which is only available in Color maps. The particle colour will be mapped to this gradient.
Or a spline control used for all other map types. The particle parameter will be mapped to the range specified by the 'Min' and 'Max' values using this spline.
Min, Max
These settings are not available in Color maps. For all others, they represent the range of mapped values for the selected parameter. For example, if Speed is the mapped parameter, the particle speed will be set to somewhere between these values. The actual value which is set depends on the mapping mode and the selected range for amplitude and/or frequency.
The nature of the value will clearly vary depending on the mapped parameter. For example in an Emission map this represents the particle birthrate of an emitter. For a Radius map, it is the particle radius. These values will therefore need to be changed depending on the parameter being mapped.
Name
Only available in Custom maps. This is a name you can give to your custom data item.
Using the Sound Modifier
This modifier is slightly different to most other modifiers in that it can do two things. Firstly, it can change the emitter to influence emission rate and change particle parameters when they are first created. It can also change particles during the course of the animation as with any other modifier.
Using the modifier
To use the modifier, you first need to choose a sound file in .wav format. Without that, nothing will happen.
Having done that, you need to map the sound file to at least one particle or emitter parameter. If this isn't done the modifier won't change anything and you won't see any effect. You can do this in the 'Map Sound' tab by clicking the 'Add' button and then choosing the parameter to affect from the drop-down list.
You can add as many maps as you like and the effects of each will be combined to give the final result.
Color mapping
In this example a sound file has been loaded and a map added. This will map the particle colour to the peak amplitude in the sound file:
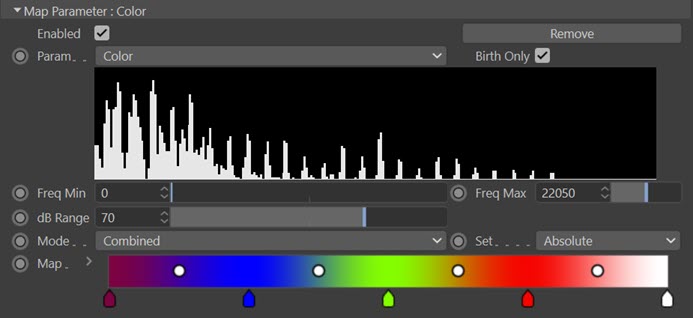
Note that 'Birth Only' is checked so that the colour is only set by the modifier on particle birth and not altered thereafter. At 90 frames the particle stream looks like this:
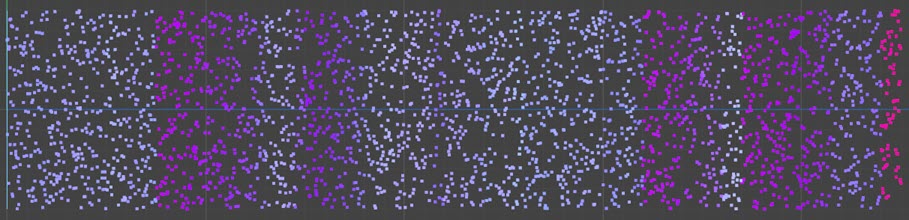
You can see that most particles are coloured using colours from the left-hand side of the 'Map' gradient. To move the colours to the right, we can change the 'dB Range' setting. The default value is 70dB but by reducing this to 30 we can force more colours from the left-hand end of the gradient to be used:
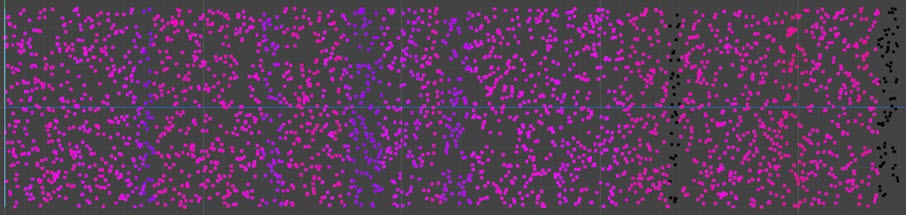
Remember, what this is showing is the peak amplitude of the sound file at the moment the particles were generated.
Speed mapping
We can add another map to make the particles faster if the amplitude was greater on emission:
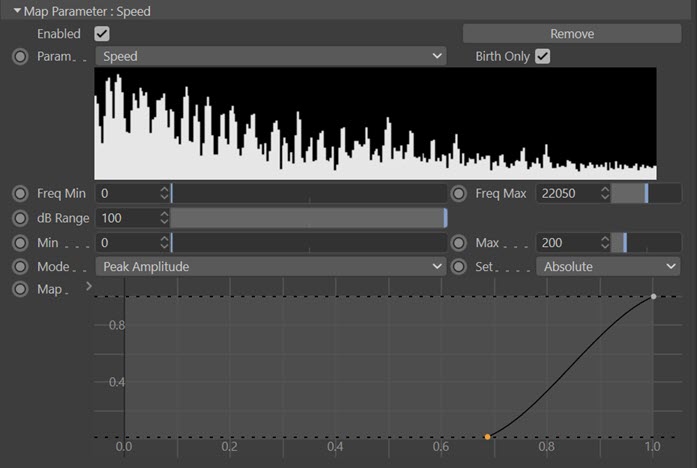
The 'Map' spline is adjusted so that the speed is greater for higher amplitudes than lower, up to a maximum of 300 units/second. At 100 frames we see this, where the two maps - colour and speed - are combined:
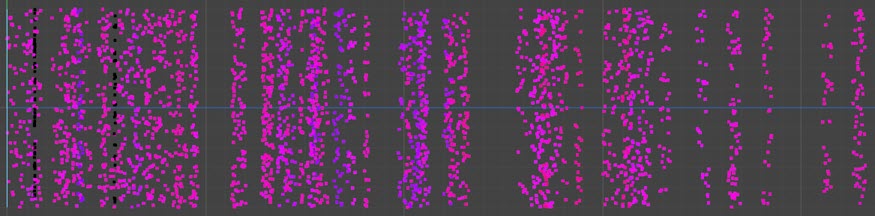
It's difficult to see from a still but the particles emitted when the amplitude was highest are the ones with the highest speed.
Mapping the particle emission
You can also change the rate of emission from the emitter by adding a map for emission mapped to peak frequency:
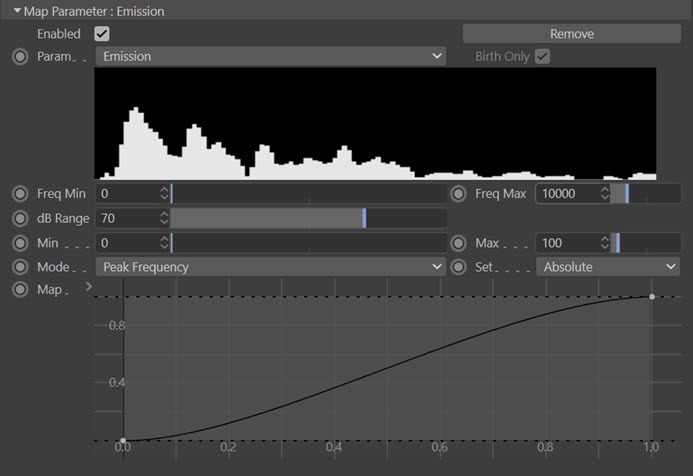
This is a low-frequency sound so the 'Freq Max' value is set to 10,000. On playback the emission looks like this:
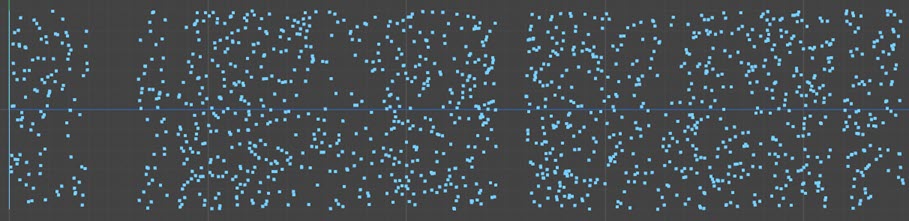
This isn't very dramatic, and it's due to the 'Freq Min' and 'Freq Max' settings. The highest emission rates will be achieved when the frequency approaches the 'Freq Max' value. By default this is 22050 Hz, but in this sound file that is never reached as it's quite a bass sound. Lowering this to 3,500 will produce a more obvious effect:
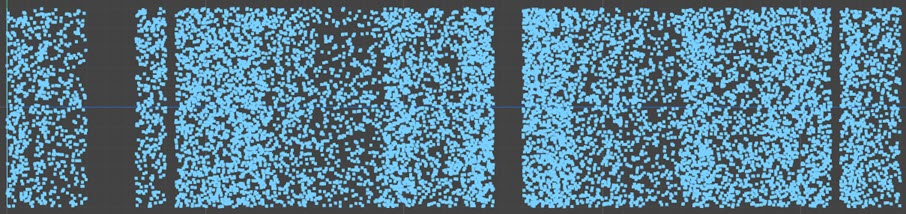
This only uses one map, but combining the emission control with other maps can produce some very dramatic effects.
Limitation with particle groups
Like all other modifiers, the Sound modifier can be set to affect only certain particle groups. However, it cannot do this when controlling particle emission. If you set up two emitters, each emitting a different group, and you use the 'Groups Affected' tab to only affect one of those groups, this will work as expected for all mapped parameters EXCEPT 'Emission'. This is because particles don't have a group until they are emitted, so there is no group (or particle, for that matter) to test - and once it has been emitted, it is too late. You should be aware of this limitation with regard to groups.
This is only a brief look at the sound modifier. You can see that the effect you get depends very much on the sound file being used, and on tweaking the parameters in the sound maps. Experimentation is recommended!