Gravity Modifier
Summary
This modifier simulates the effect of gravity on a particle. It includes a Newtonian gravity mode to allow the orbit of particles around an object.
Interface
The modifier has two possible user interfaces, depending on the mode selected. These are:
For the 'Groups Affected', 'Mapping', and 'Falloff' tabs, and for the buttons at the bottom of the interface, please see the 'Common interface elements' page.
Parameters
Standard mode
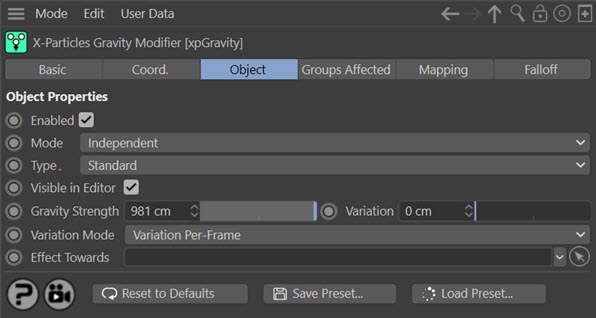
Editor appearance
In this mode, the on-screen representation of this modifier looks like this:
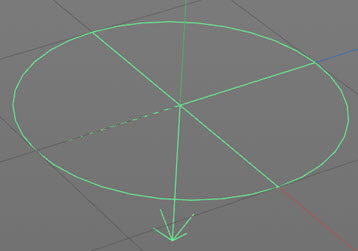
You can rotate the modifier on any axis and the particles will follow the direction in which the arrow points. By default this is along the negative Y world axis.
Enabled
Uncheck this switch to disable the modifier.
Mode
Independent [default setting]
In this mode, the modifier will work in the same way as a standard Cinema 4D particle modifier: particles will be affected if they come into the field of effect of the modifier. X-Particle Actions have no effect on the modifier in this mode.
Action-Controlled
In this mode, the modifier will only act on a particle when told to do so by an Action. Until that point, the particle will not be affected, but once activated for a particular particle, the modifier will continue to influence it as long as it is in the field of effect of the modifier. The modifier's effect on a particle can be halted by means of another Action, if desired.
Type
This drop-down menu enables you to switch between 'Standard' and 'Newton' modes. 'Standard' works in the same as the standard Cinema 4D Gravity modifier. 'Newton' is a simulation of Newtonian gravity.
Visible in editor
The Gravity modifier has its own representation in the editor. If you don't want to see that, but still want the modifier to be active, uncheck this switch.
Gravity Strength and Variation
The strength of the gravity. By default the modifier always moves the particle ‘down’ – i.e. in the world negative Y direction. However, you can enter negative values here which will move the particle ‘up’ along the world positive Y axis.
You can add some random variation to the strength with the 'Variation' setting.
Variation Mode
Gravity variation can work in one of two ways. The options are:
Variation Per-Frame
In this mode, the gravity acting on each particle will vary each frame. This will cause each particle to follow a slightly 'wobbly' path as the change in direction will vary a little each frame.
Fixed Per-Particle
The alternative mode is that the force acting on each particle is fixed when the particle enters the field of effect, but it will vary between different particles (assuming that 'Variation' is greater than zero). Each particle will follow a smooth curve but the particle stream will fan out more than if 'Variation Per-Frame' is chosen.
Effect Towards
As well as being able to rotate the modifier to point in any direction, if you drop an object into this field the modifier will always point towards it. You can then animate the linked object and the modifier will point at it, causing the particle stream to move in that direction.
Newton mode
If 'Type' is changed to 'Newton' the interface changes:
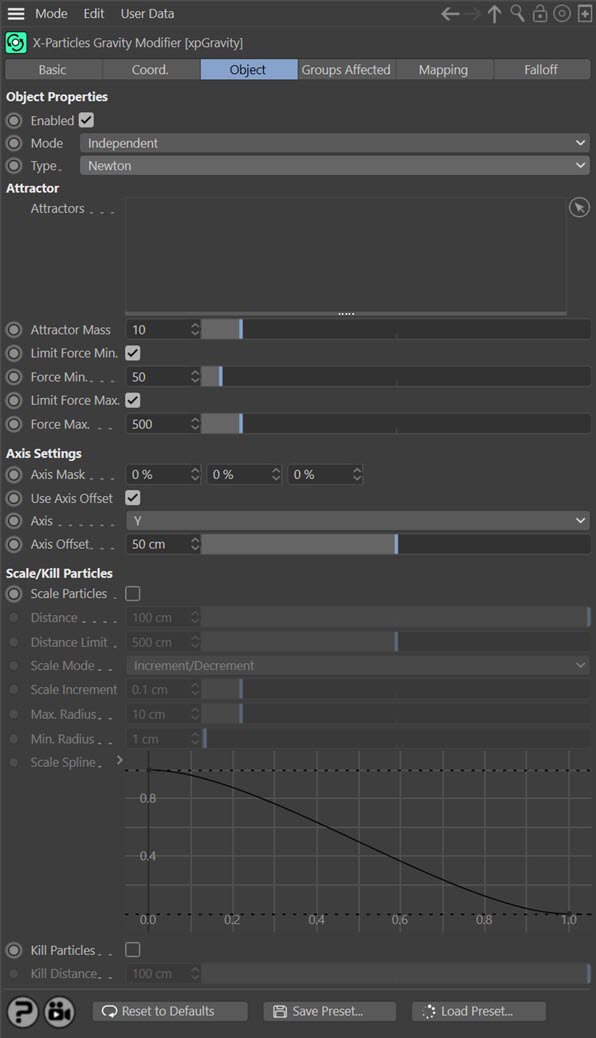
This is a simulation of Newtonian gravity. With it you can setup simulations such as planets orbiting a star.
Caution: this is not intended to be a physically-realistic simulation; don't plan your next moonshot with it. It uses the standard gravity constant and the mass of the objects to calculate particle velocities but makes certain assumptions and internal calculations to fit the simulation into the small 3D world.
Newtonian gravity states that two objects will attract one another with a force depending on their mass and the square of the distance between them. Both factors are taken into account by the modifier. The main limitations are that:
- mass values are effectively arbitrary and do not reflect real-world values
- it is possible to limit the force applied to a particle to between upper and lower limits
- the attractor is assumed to be stationary and to have far greater mass than the particles
- particle mass influences the result but there is no particle-particle gravitational attraction
See 'Hints on using the Newton mode' before using this mode for the first time.
Attractors
This list holds the object which the particles are attracted to by its 'gravity'. It can be any object, even a null. More than one object can be added; the modifier will use all objects in the list.
Attractor Mass
The assumed mass of the Attractor object. If it is set to zero, no attraction will occur. Otherwise the mass value can be increased until you generate the required force to attract the particles.
Limit Force Min.
Because the gravitational attraction falls off very rapidly with distance, sometimes particles may not be attracted, or may be attracted very slowly, by the Attractor. If this happens you can increase the attractor mass, but this may then apply too much force to nearby particles. In that case, check this switch and alter the 'Force Min.' value as required. That minimum will be applied to all particles, regardless of distance.
Force Min.
The minimum force value if 'Limit Force Min.' is checked.
Limit Force Max.
This is the opposite of 'Limit Force Min.'. If checked, it limits the force that can be applied to a particle to the value in 'Force Max.'. This enables you to prevent extreme forces being applied to some particles.
Force Max.
The maximum force value if 'Limit Force Max.' is checked.
Axis Mask
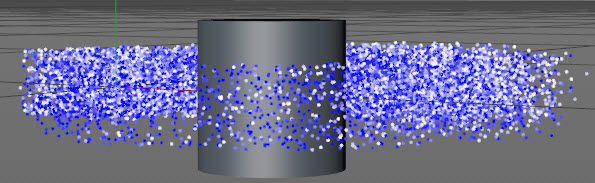
This parameter effectively reproduces some of the function of the Limit modifier. It is useful because particles are drawn to the axis centre of the Attractor object, not its surface. Consequently a particle stream will narrow as it approaches the object like this:
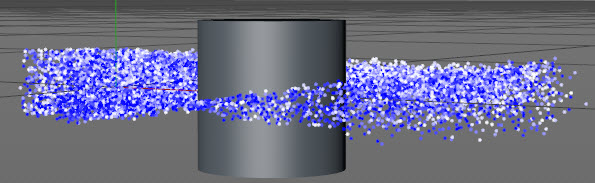
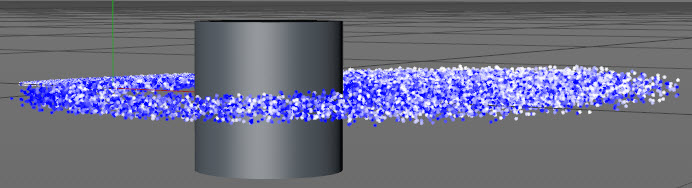
This narrowing is not always desirable. You can stop it from happening, or at least reduce the effect, by increasing the value in this parameter. Each number represents one axis. In this screen shot, the Y axis has been limited by 100%, producing this result:
You can achieve some interesting abstract effects by keyframing these values.
Note that this problem only arises if the particle stream extends above or below the object position. In other words, in the above image if the emitter height was zero and the emitter was at the same point on the world Y-axis as the axis centre of the object, the particles would stay on the same plane and the axis mask would not be required.
The parameter is there for convenience only. If you prefer, leave it at zero and use the Limit modifier instead.
Use Axis Offset
As mentioned above, particles normally head for the axis center of the attractor. This means that the particle stream narrows as it reaches the object. To avoid this, check this switch and enter the desired value into the 'Axis Offset' parameter. This will offset the target position along the axis selected in the 'Axis' parameter.
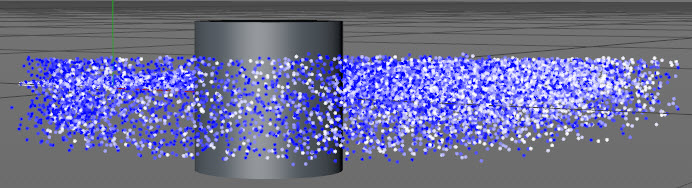
The difference can be seen in these screenshots. The top image has an offset of 10, the bottom one an offset of 50, both starting with an emitter height of zero and with the axis mask set to 2% on the Y axis::
Axis
The axis to apply the offset along. Note that this is the 3D world axis, not the object's axis.
Axis Offset
The amount of offset. The actual offset for each particle will be a randomly-selected value in the range given here. In other words, if the value in this parameter is 50 screen units, each particle will receive an offset in the range -50 to +50.
Scale Particles
If checked, the modifier will also scale the particles as they approach the attractor object(s).
Distance
To be affected by scaling, the particles must be at a distance from the attractor object which is the distance in this parameter plus that in the 'Distance Limit' parameter.
The actual scaling is calculated in this way:
- if the particle is at or less than the value in the 'Distance' parameter, the particle radius will be increased or decreased by the value in the 'Scale Increment' setting
- if the particle is at a greater distance from the object than the 'Distance' plus 'Distance Limit' setting, it is not scaled at all
- if it lies between these two values, an index value is calculated and used to select a value from the 'Distance Spline'; this is then multiplied with the 'Scale Increment' setting to give the actual change in radius
You can see from this that between the 'Distance' setting and the 'Distance' plus 'Distance Limit' setting, there is a falloff in the amount of scaling which occurs. The spline can then be used to fine-tune the scaling.
Distance Limit
The limit on the distance used to calculate scaling.
Scale Mode
This drop-down menu has two options:
Increment/Decrement
The particle radius will increase as it nears the attractor object and decrease as it moves away from it.
Increment Only
The particle radius will only increase, never decrease.
Scale Increment
The amount by which the particle radius will change. This is modified as a result of the 'Distance' calculation (see above) and also by the modifier falloff.
Max. Radius, Min. Radius
These two settings can be used to prevent the particles becoming excessively large or disappearing altogether. They are also modified by the 'Distance' calculation (see above).
Scale Spline
A value obtained from this spline is used to alter the amount of scaling (see above).
Kill Particles
If this switch is checked, particles which are closer to the attractor object than the value in 'Kill Distance' are killed.
Kill Distance
Particles closer to the attractor object than this parameter will be killed (as long as 'Kill Particles' is checked).
Hints on using the Newton mode
To get the best out of this mode, consider the following points.
1. The initial particle direction, before being attracted to the attractor object, should be tangential to the object. That is, the results if the particles are initially heading straight towards it, or directly away from it, may be less than optimal because the particles will head for the attractor in a straight line instead of orbiting.
2. If particles seem to explode in all directions after reaching the attractor the force operating on them is too great. In that case, either reduce the attractor mass, or increase the particle mass, or increase the initial particle speed, or if necessary use the 'Limit Force Max.' and 'Force Max.' parameters to prevent it.
This does mimic what happens in the real world. If an object (e.g. an asteroid) is attracted to another (e.g. a star) it falls towards it. Only the speed with which it is moving prevents it from falling into the star, where it would be destroyed, and moving around it. If this happens in the simulation the particle simply flies off at high speed away from the attractor. You can try using the 'Kill Particles' switch to prevent this but it is generally better to adjust particle speed and mass to prevent this from happening.
3. Keep the attractor mass small. This value has no real-world meaning but increasing it will add greatly to the force acting on the particles and may result in an unstable simulation.
4. Orbits are always elliptical, not circular. This is identical to orbits in the real world. The larger the attractor mass, the greater the acceleration in particle speed and the more elliptical the orbit becomes. If you need as circular an orbit as possible, keep the attractor mass low and use the initial particle speed and/or mass to control the orbit.
5. If some or all particles are not attracted to the attractor, you may need to turn up the force by increasing the attractor mass. Don't be tempted just to set a minimum force unless that's the only way you can get a stable simulation.
Important: the 'Attractor Mass' setting controls the amount of force applied to the particles. You can also increase the force by using the 'Limit Force Min.' and 'Force Min.' settings. but the disadvantage of doing that is that the same minimum force is applied to all particles regardless of their distance from the attractor. This is not always realistic.
6. The particle mass has a significant effect on the simulation. The smaller the mass, the greater the effect due to the larger acceleration the force will generate. Even small changes in mass can have a profound effect. Typically, with the default settings you will see a clear difference between particles with a mass of 1 and those with a mass of 1.5, for example. Try adding a Scale modifier set to change particle mass - you will see a profound change in the simulation.
7. This mode plays very nicely with other modifiers. A Turbulence modifier, for example, with a very low strength setting, can introduce a pleasing element of chaos into the simulation. You can use a Drag modifier in conjunction with scaling the particle size to affect movement - as the size increases, the Drag modifier will have a greater effect.
8. Be prepared for long simulations to get a stable orbit. There's no real way to speed this up, it all depends on the settings in the particles and the modifiers.