Constraints Object
Before using the Constraints object for the first time please read the section 'Using the Constraints object' at the bottom of this page.
Interface
The object's interface has several tabs:

Each tab is shown in its own section below.
For the 'Groups Affected' and 'Falloff' tabs, and for the buttons at the bottom of the interface, please see the 'Common interface elements' page.
Connections tab
Birth quicktab
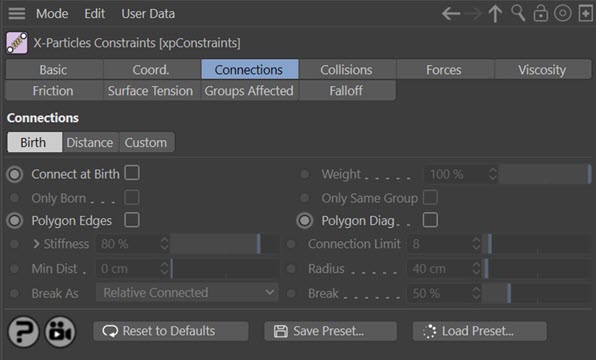
Connect at Birth
If checked, makes a connection between a particle when it is born and any other particle, subject to the settings such as Connection Limit and Radius.
Weight
See 'Using the Constraints object' below.
Only Born
If checked, only makes connections between particles born at the same time.
Only Same Group
Connections will only be made between particles in the same group. But see 'Polygon Edges, 'Polygon Diag' below for a caveat to this switch.
Polygon Edges, Polygon Diag
These switches enable the particles to follow a cloth-like behaviour without the need for the overhead of Cloth FX. To use them, emit particles from an object such as a Plane object, turn on these switches, and also turn on collision in the Collisions tab. Then the particles will behave like this:
The particles are connected at birth along the polygon edges and/or diagonals, giving a more formal structure than the usual connections at birth.
if you have checked one or both of these switches, the formation of constraints along edges (and/or diagonals) takes priority over the 'Only Same Group' switch. In other words, if an edge has particles from different groups at each end of the edge, and 'Polygon Edges' is checked, a connection will be made between the two particles even if the 'Only Same Group' switch is checked.
Stiffness
This is a measure of how "strong" the connection is. Note that for stiffer connections it can give more predictable results to have a lower 'Stiffness' value and higher iterations and/or subframes (see the X-Particles project settings). A very high stiffness can cause unstable solving.
The stiffness settings can be expanded by clicking the little arrow to the left of the word 'Stiffness' to show a control spline and other settings:
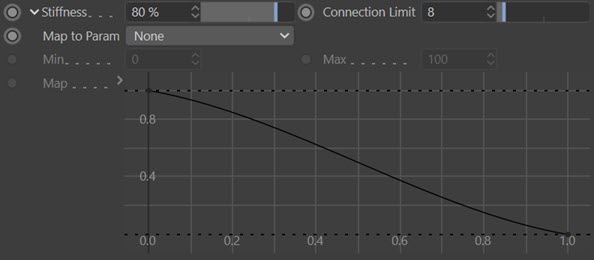
These settings are:
Map to Param
The value from the 'Map' spline is mapped to the parameter chosen from this drop-down. For example, if the drop-down is set to 'Radius' particles with a small radius take the value from the left of the spline, while those with a larger radius take it from the right of the spline. This is a percentage value which is then multiplied with the 'Stiffness' setting to produce the final result.
The parameters which can be mapped are:
- Temperature
- Mass
- Age
- Radius
- Speed
Min, Max
These are the minimum and maximum values from the mapped parameter. For example, if 'Radius' is mapped then a minimum value of zero means that particles with a radius of zero take the mapped value from the extreme left of the spline, while particles with a radius of 100 or more take the spline value from the extreme right of the spline.
Map
The control spline to which the selected parameter is mapped.
Connection Limit
This is a limit on the number of connections each particle can make. Keep this as low as possible, as too many connections can dramatically slowdown playback in the scene.
Min Dist
This setting limits the connections made to particles which are further away than this distance. This helps to control clumping so that particles don't just connect to the very closest ones.
Radius
The distance between particles must be less than this value for a connection to be made.
Break As
This drop-down controls how the link should break. A broken link means that there is no longer a connection between the particles. It has four options:
None
Connections will not break if this option is selected.
Relative Connected
The value in 'Break' is a percentage value of the distance when the particles were connected.
Relative Radius
The value in 'Break' is a percentage value of the distance in 'Radius'.
Absolute
'Break is an absolute distance setting and connections will break when they are longer than the 'Break Above' value.
Break, Break Above
A measure of how much the connection can stretch before it breaks. 0% means that the connection will never break. 50% means that it will break when it has stretched by 50% of its original length. When 'Break As' is set to 'Absolute' this changes to a distance measurement (labelled 'Break Above'), rather than a percentage. In this case the connection will break when it is longer than this value.
Note that the 'original length' is the length of the connection at the moment it is made. The actual length is relative to the particle radius. For example, a particle with a radius of 10 units will make a connection that is 10 units long but for a particle with a radius of 2 units the connection will be 2 units long.. This can then be stretched if the particle moves away from the surface and will break when stretched more than the percentage given in the 'Break' setting.
Distance quicktab
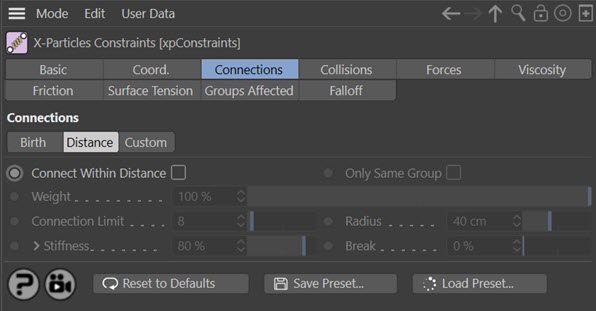
Connect Within Distance
If this switch is checked, connections will be made between particles within the distance specified in 'Radius'.
Only Same Group
Connections will only be made between particles in the same group.
Break
With the Distance connections, 'Break' behaves in the same way as 'Relative Connected' in the 'Birth' connections section.
Other parameters
The other parameters in this section work in exactly the same way as in the 'Birth' section, including the additional settings if you click the little arrow next to the label 'Stiffness'.
Custom quicktab
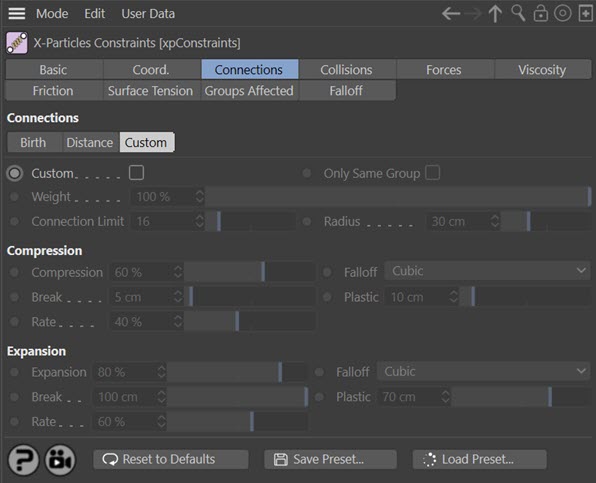
Custom
With this connection type you can set the parameters manually so as to connect and disconnect particles dynamically.
Only Same Group, Weight, Connection Limit and Radius
See the parameters with the same name in the 'Birth' section.
Compression section
Compression
This is the stiffness when the link (the connecting 'spring') is compressed.
Falloff
This drop-down controls how the stiffness falls off over the 'Radius' value. It has four possible settings:
- Flat
- Linear
- Quadratic
- Cubic
Break
This is an absolute distance; it represents the distance below which the connection will break.
Plastic
Below this distance the connection becomes 'plastic' - that is, it will no longer try to spring back to its original length, it has been deformed too much. Note that the stored length of the constraint changes depending on the 'Rate' value.
Rate
This is the rate at which the link becomes plastic (fixes to the new distance between the particles as they move in the scene).
Expansion section
Expansion
This is the stiffness of the link if the distance between the connected particles is greater than its connection distance (how far apart they were when linked).
Falloff, Break, Plastic and Rate
See the parameters with the same name in the 'Compression' section.
Collisions tab
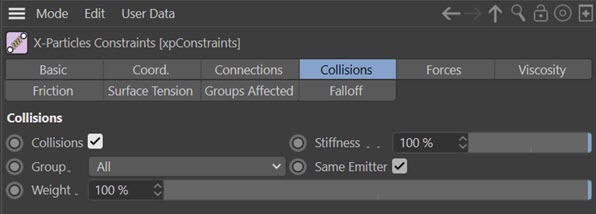
This tab provides very simple particle to particle collisions but is much faster than the P-P Collision object and solves as part of the constraint. In other words, the collision can be a condition to the final solution of the constraint and not just an absolute value.
Collisions
Check this switch to enable collision constraints.
Stiffness
This controls how stiff the collision is. Essentially a dynamic 'spring' is created to keep the particles apart (from intersecting).
Group
This drop-down menu has three options:
All
Collisions between particles will occur regardless of what group the particles are in.
Same Group
Collisions will only occur between particles in the same group.
Different Groups
Collisions will only occur between particles in different groups.
Same Emitter
If this switch is checked, collisions will take place between particles emitted from the same emitter and between particles from different emitters. If it is unchecked, collisions will only take place between particles emitted from different emitters.
Weight
See 'Using the Constraints object' below.
Forces tab
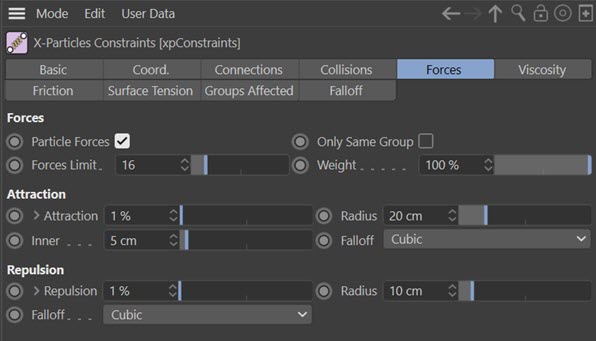
These are forces which act between particles but there is no connection made between the particles.
Particle Forces
Check this switch to enable particle forces.
Only Same Group
Connections will only be made between particles in the same group.
Forces Limit
This is the number of particles the force is allowed to act on at the same time. The more particles the longer it takes and the more iterations are needed to complete the solution.
Weight
See 'Using the Constraints object' below.
Attraction section
Particles will attract one another but only if the distance between them is less than the Radius value.
Attraction
The strength of attraction is given in this setting.
The 'Attraction' setting can be expanded by clicking the small arrow to the left of the word 'Attraction' to show a control spline and other settings. This spline acts to control attraction in exactly the same way as the 'Stiffness' parameter in the Connections tab.
Radius
For attraction to take place the distance between two particles must be less than this value.
Inner
This limits the force so it only applies if the particles are farther apart than this value, which prevents them from completely collapsing.
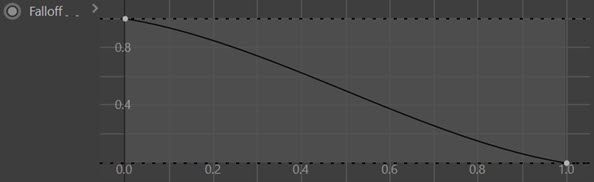
Falloff
The falloff of the attraction effect over the 'Radius' distance. It has five possible settings:
- Flat
- Linear
- Quadratic
- Cubic
- Custom
Selecting 'Custom' will show a control spline for falloff which can be changed as required:
Repulsion section
Particles will repel one another but only if the distance between them is less than the Radius value.
Repulsion
The strength of repulsion is given in this setting.
The 'Repulsion' setting can be expanded by clicking the small arrow to the left of the word 'Repulsion' to show a control spline and other settings. This spline acts to control repulsion in exactly the same way as the 'Stiffness' parameter in the Connections tab.
Radius, Falloff
These settings are identical to those in the 'Attraction' setting.
Viscosity tab
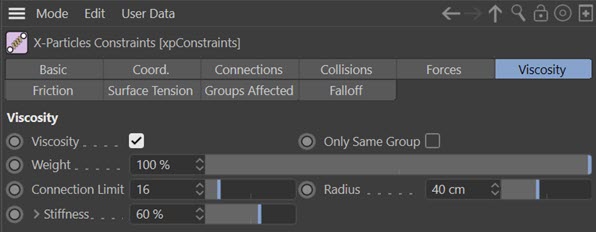
This tab provides a viscosity solver that can generate the effect of low or high viscosity in the particle flow. How high the viscosity can be depends on the iterations and subframes in the project settings (just as with all the constraints).
Viscosity
Check this switch to enable viscosity.
Only Same Group, Weight
These work in the same way as the other constraint types.
Connection Limit
How many surrounding particles are included in the viscosity solution. This doesn't need to be very high. If it is too high you will need lots more iterations/subframes. Keep it low and try more iterations/subframes.
Radius
This is the maximum distance to surrounding particles to include in the viscosity solution.
Stiffness
Much like the other constraints, the stiffness represents how strong the viscosity is, but it is not linear (as with the other constraints) and the actual viscosity depends on this value and the iterations/subframes in the project settings.
You can get a higher and more stable viscosity with this as a lower (not 100%) value and more iterations/subframes. By having a softer constraint and more iterations/subframes you enable the particles to avoid large changes which can result in instability, especially when solving against other constraints (including fluids, FLIP and SPH).
By clicking the small arrow to the left of the label 'Stiffness' to show a control spline and other settings. This spline acts to control viscosity in exactly the same way as the 'Stiffness' parameter in the Connections tab.
Friction tab
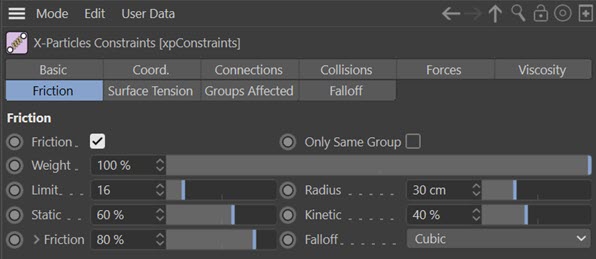
This tab represents friction occurring between particles.
Friction
Check this switch to enable friction.
Only Same Group, Weight, Limit, Radius
These work in the same way as in the 'Viscosity' tab.
Static
This value is a percentage of the 'Radius' value. Within this distance the particles have the full friction stiffness applied, which results in something like static friction where they try to hold each other to stop relative motion between them.
Kinetic
If the distance between particles is greater than the value derived from the 'Static' parameter, how stiff the friction then is.
Friction
The strength of friction is given in this setting.
The Friction setting can be expanded by clicking the small arrow to the left of the word 'Friction' to show a control spline and other settings. This spline acts to control friction in exactly the same way as the 'Stiffness' parameter in the Connections tab.
Falloff
The falloff of the friction effect over the 'Radius' value. It has four possible settings:
- Flat
- Linear
- Quadratic
- Cubic
Surface Tension tab
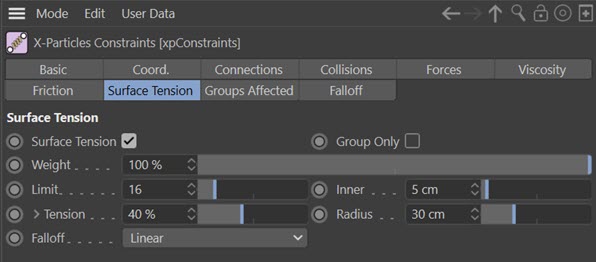
Surface tension is similar to the 'Attraction' force ('Forces' tab). It is an attractive force between the particles, except it only happens at the 'surface'. This is an SPH surface, so it is determined by a radius around each particle that contributes to an overall surface, much like the Skinner and SPH Fluid object.
This is best used with another constraint (Forces or Collision) to keep the particles apart and create an inner force to give volume.
Surface Tension
Check this switch to enable surface tension.
Only Same Group, Weight, Limit
These work in the same way as in the 'Viscosity' tab.
Inner
As in the 'Attraction' force, this is the closest distance the force is allowed to prevent collapse. If using with SPH fluids set this to be similar to the SPH radius to allow the SPH to control the density of particles within this distance.
Tension
The strength of surface tension is given in this setting.
The 'Tension' setting can be expanded by clicking the small arrow to the left of the word 'Tension' to show a control spline and other settings. This spline acts to control surface tension in exactly the same way as the 'Stiffness' parameter in the Connections tab.
Radius
This is the surface and force radius, increasing this creates bigger blobs of particles.
Falloff
The falloff of the surface tension effect over the 'Radius' distance. It has four possible settings:
- Flat
- Linear
- Quadratic
- Cubic
Using the Constraints object
Think of a constraint as being a means of restricting particle movement. A constraint is like a tiny spring between particles, or between particles and a collider object. This spring can pull particles together, can stretch, and can also break. The Constraints object calculates the resulting forces from this spring (technically it 'solves' the constraint) and can combine several different constraints to produce a final solution.
Note that solving the constraints may require more subframes and/or iterations then the default values, especially if high stiffness levels or strong forces are used. You can alter these values scene-wide in the X-Particles tab in the project settings.
To restrict the Constraints object to certain particles, simply create however many particle groups are required and drag the particle groups to be affected by the Constraints object into the 'Groups' list in the 'Groups Affected' tab.
Connection constraints can be seen in the viewport as yellow lines connecting the particles. However, this does add some overhead, so to see the constraints in the viewport you must turn on 'Display Constraints' in the Display tab of the emitter.
It is possible to use the constraints as splines that can be rendered or used to generate geometry. To do this, add a Trail object to the scene, link it to the emitter, and set the algorithm to 'Constraints'.
X-Particles settings in the Project settings
For stiff constraints, more iterations and a higher number of subframe steps are required. If you find that connections are not being made, or don't behave as expected, try adjusting these values.
Weighting
Each constraint object solves all of the constraints enabled within it at the same time, finding a solution (particle positions) that satisfies all the constraints enabled in the object together, depending on the 'Weight' value set for each type of constraint. In other words, the 'Weight' value alters the influence each constraint type provides to the overall solution.
Collisions and other constraint types
In addition to particle connections (found in the 'Connections' tab) there are several other types of constraints, such as collisions, friction, etc. These constraints are solved independently of each other. For example, if you only need collision constraints, enable only those and place the constraint object last in the Object Manager. This is important because the order of solving constraints is in the order the constraint objects are found in the OM.