Particle Paint Tool
With this tool, you can paint particles on the surface of a polygon object (or one which would be a polygon object if collapsed) and then edit their properties.
Interface
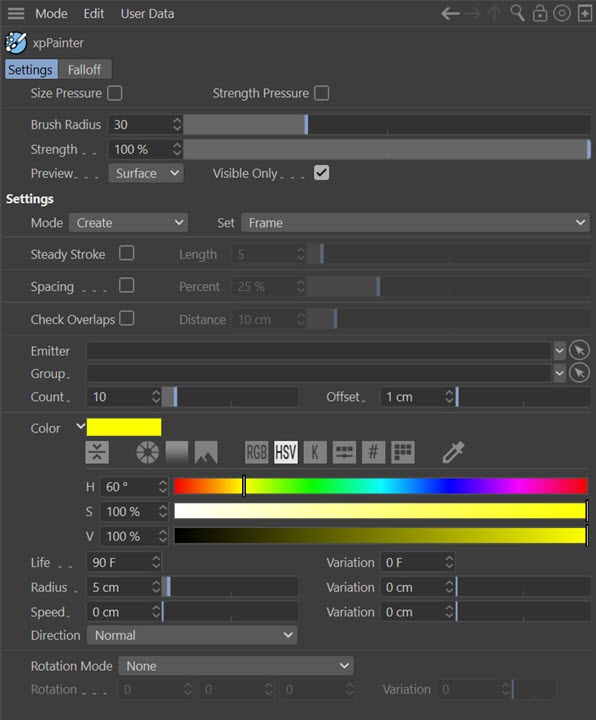
The tool's interface looks like this:
Using the Paint tool
To use the tool, select an object in the Object Manager. You can drag an existing emitter into the 'Emitter' field, or if you don't do that, the tool will automatically create a new emitter for you. Note that if a new emitter is created, the 'Spawn Only' switch will be set automatically.
An emitter cannot emit on the first frame of a scene, so you MUST advance the timeline by at least one frame to make the tool functions available. Whatever frame you move to, on playback particles will only be emitted once the timeline reaches that frame. You can paint on multiple different frames if desired.
When you start painting, particles will be created with the parameters in the tool's interface - colour, speed, lifetime, direction, etc. You can also specify the particle group.
Settings tab
Brush Radius
The size of the brush. In Cinema 4D R14 and above you can use the square bracket keys to increase or decrease the brush size (not available in R13).
Blend
This is the strength of the brush, it blends between the painting values (e.g. particle color) and those already in the particles.
Preview
This drop-down has three settings:
None
The brush preview is not visible (but particles can still be painted).
Surface
The brush preview follows the surface of the object.
Screen
The brush preview is always on the same plane as the screen, so always appears as a circle.
Mode
This drop-down has several settings.
Note: to create new particles the object to paint them on must be selected in the Object Manager. For all other settings, when you are editing existing particles, you MUST select the emitter in the Object Manager. This is essential because at that point you are editing the particle data which is held by the emitter.
Create
This setting enables you to paint new particles. Simply select an object and paint on it to create the particles. The number to create as you paint is given in the 'Count' parameter. When you create new particles, they are given the settings in the Color, Life, Radius, Speed, Direction and Rotation settings.
Holding CTRL during painting with Create will remove any particles creates by the paint tool.
Delete Particles
When you paint, existing particles are deleted.
Holding CTRL during painting with Delete Particles will undelete the particles so on the next playback the particles is available again. To see deletes particles you need the Show Deleted enabled in the emitter, you will need to replay the animation if the particles are already deleted.
Painting Particle Properties
Holding CTRL during painting any of the particle properties will remove the painted property back to the original particles value.
Paint Life
This will change the lifespan of the particles to the value in the 'Life' setting.
Paint Color
This will change the colour of the particles to the value in the 'Color' setting.
Paint Speed
This will set the speed of the particles to the value in the 'Speed' setting.
Paint Radius
This will set the radius of the particles to the value in the 'Radius' setting.
Paint Rotation
This will set the rotation of the particles to the value in the 'Rotation' setting.
Set
This drop-down has two settings:
Frame
The painted property is set for the current frame so on playback the property (e.g. colour change) will happen at the same frame.
Birth
The painted property is set at the birth of the particle so that it is emitted with the same painted property on playback.
Steady Stroke and Length
If 'Steady Stroke' is checked, the brushing only moves if the mouse moves a greater distance than the 'Length' setting from the current brush position.
Spacing and Percent
If 'Spacing' is checked, the brush painting is spaced out by a percentage of the brush radius. The amount of spacing is found in the 'Percent' field.
Check Overlaps and Distance
If 'Check Overlaps' is checked, then when creating particles the emitter is checked for any existing or painted particles with a distance given in the 'Distance' setting. It will only create a particle is none is found within this distance.
Emitter
The emitter being used to generate the painted particles. An existing emitter can be dragged in here, or if not one is automatically created as soon as you begin to paint new particles.
Group
If you drag an X-Particles Group object into this field, new particles will belong to this group.
Count
The number of new particles to create (clicking the mouse once will create this many particles). If can also be set to a fractional value for finer painting control (for example, less than 1.0)
Offset
The particles will be created this distance away from the object surface.
Color
The colour of new particles, or the colour used when you are in 'Paint Color' mode.
Life (and Variation)
The lifespan of new particles, or the lifespan used when you are in 'Paint Life' mode.
Radius (and Variation)
The radius of new particles, or the radius used when you are in 'Paint Radius' mode.
Speed (and Variation)
The speed of new particles, or the speed used when you are in 'Paint Speed' mode.
Direction
This drop-down has a number of settings which control the direction of newly-painted particles:
Normal
The particles have the direction of the normal of the surface from which they were emitted.
Random
The particles have a random direction.
World (X+, Y+, Z+, X-, Y-. Z-)
The particles follow the corresponding direction along one of the 3D world axes.
Object (X+, Y+, Z+, X-, Y-. Z-)
The particles follow the corresponding direction along one of the object axes.
Rotation Mode
This drop-down has three settings:
None
The particles are not rotated.
Align Normals
The particles are rotated so that they are aligned with the surface normal. This will cause any geometry linked to the particle to be rotated accordingly.
Custom
The particles are rotated according to the value in the Rotation field. This will cause any geometry linked to the particle to be rotated accordingly.
Rotation (and Variation)
The custom rotation to use when 'Rotation Mode' is set to 'Custom'.
Falloff tab
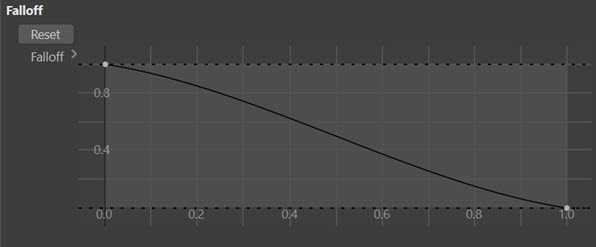
Falloff
You can modify the Falloff spline to alter the falloff used by the brush. Click the 'Reset' button to reset it to its default shape.