The X-Particles Distance Shader
This shader can be used in any material channel which has a shader link. Although written for X-Particles, it can be used on any polygon object or object primitive.
What this shader does is affect the shading according to the distance of the point to be shaded from some other location. Typically, this would be the active scene camera, but you can use any object or the 3D world centre instead. You can use it to change colour with distance, or fade an object out (or in) depending on the distance from the chosen point.
Interface
This is the shader's interface:
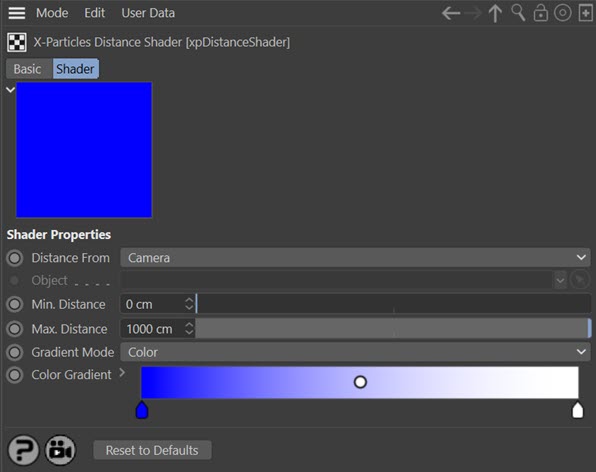
For the buttons at the bottom of the interface, please see the 'Common interface elements' page.
Parameters
Distance From
This is the reference point from which the distance to the point to be rendered is calculated. The drop-down menu has three options:
Camera
The distance is from the active scene camera.
Object
The distance is from any scene object. The object to use must be dragged into the 'Object' field.
World Center
The distance is from the centre of the 3D world.
Note: the following three modes do not shade an object evenly across its surface. Instead, each polygon receives the same colour for each rendered point on its surface.
Stretch
This mode uses the longest edge of the polygon being rendered. For each polygon, the longest edge is determined. If the edge is shorter than 'Min. Distance' the colour at the left-hand end of the gradient is used; if greater than 'Max. Distance' the colour at the right-hand end of the gradient is used.
To see how this works, consider a primitive Cube with 8 segments on the X and Y axes like this:
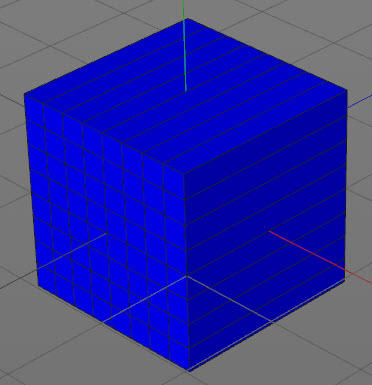
And the distance shader is set up like so:
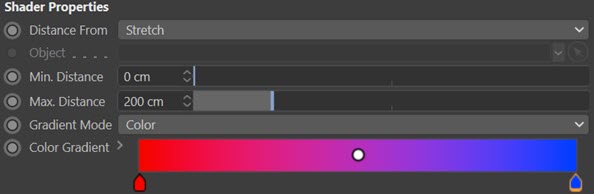
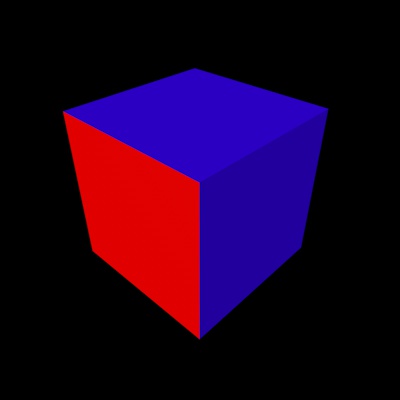
When rendered, the result is this:
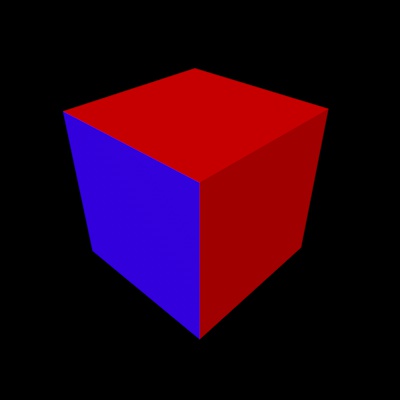
The small polygons all have a maximum edge size of 25 units, so they receive a colour about one-eighth of the way along the gradient (nearly pure blue, but not quite). The large polygons all have a maximum edge size of 200 units, so they receive the colour at the right of the gradient (red).
Area
This works the same as 'Stretch' mode but instead the polygon area is used. This means that unlike 'Stretch' mode, polygons of different shapes but with the same area will receive the same colour.
In this render the same cube is used but 'Max. Distance' has been set to 40 units. Since the polygon area is being calculated, this value is squared internally. The result looks like this:
In this case the area of the small polygons is 25x25 = 625 units. 'Max. Distance' squared is 40x40 = 1600 units. The result from dividing 625 by 1600 is used to select the gradient colour (about a third of the way along the gradient). The large polygons have an area of 25x200 = 5000 units, so these are larger than the area specified by 'Max. Distance' and so receive the colour from the right-hand end of the gradient.
Aspect Ratio
In this mode the aspect ratio of the polygon is calculated by dividing the minimum edge length by the maximum edge length. The actual size of the polygon is irrelevant, so the maximum and minimum distance variables are not used.
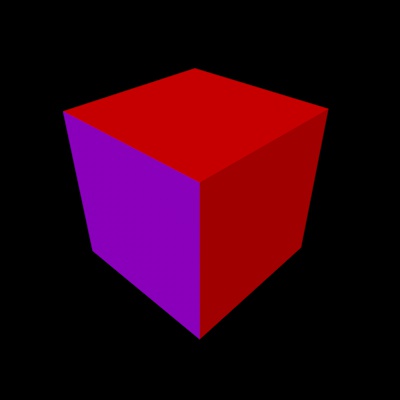
Polygons with equal-length edges will have an aspect ration of 1.0 and therefore receive the colour from the right of the gradient. Polygons with unequal edges will have an aspect ratio between 0.0 and 1.0 and will receive a colour from somewhere along the gradient. Here is the same cube as shown above but rendered in this mode:
Note how the small polygons are square, so their aspect ratio is 1.0. The larger polygons have an aspect ratio of 25/200 = 0.125, so receive the colour near the left-hand end of the gradient.
Object
The object to use when 'Distance From' is set to 'Object'. Note that the distance is calculated from the centre of object's axis, not from the closest polygon or vertex.
Min. Distance & Max. Distance
Shaded points which are less than 'Min. Distance' from the reference point will use the colour at the left hand end of the color or alpha gradient. Points which are further than 'Max. Distance' from the reference point will use the colour at the right hand end of the gradient. Points in between these limits will use a colour from somewhere along the gradient.
Gradient Mode
You can choose from two types of gradient, colour or alpha. This is really just for convenience. You can use the colour gradient in an alpha channel or the alpha gradient in a colour channel, it doesn't make any difference. Typically though you would use a colour gradient in a material's Color channel for example, and a black/white alpha gradient in the Alpha channel.
Color
Select this option if you need a coloured gradient. Note that you can edit a coloured gradient to be monochrome if you like, or you can switch to the alpha gradient instead.
Alpha
Select this option for use in any channel where you need a monochrome gradient (e.g. the Alpha channel of a material). Note that you cannot edit such a gradient to change it to a coloured gradient.
Color Gradient/Alpha Gradient
Either a coloured gradient or an alpha gradient is shown, depending on the 'Gradient Mode' setting.