Generator Object
The Generator object is responsible for generating objects in the scene. This is needed because the Emitter object only generates and manipulates particle data. If you want objects to be associated with those particles, you will need to add a Generator object.
What can be generated?
The Generator will generate almost any kind of object, though some are excluded. For example, it doesn't make much sense to generate multiple Sky objects, so X-Particles won’t let you do that. Nor will it generate objects such as particle modifiers, since these have no effect on the scene (this is a restriction within Cinema 4D, not X-Particles).
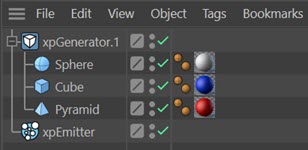
For any valid object create the object and make it a child of the Generator object. Then ensure that 'Draw Mode' is set to 'Geometry Only' or 'Geometry and Particles'. Playing the animation will now generate multiple copies of the child object(s).
Note that if you turn on object generation, but the Generator doesn't have any valid child objects, nothing will be generated at all. You may not even see particles in the editor, depending on the setting in 'Draw Mode'. It’s up to you to make sure that there is a valid child object or objects to generate.
What if the generator has more than one child object? There are several options to handle this. For more details, please see the 'Use Multiple Child Objects' section below.
Interface
The object's interface includes these sections:
For the 'Groups Affected' tab, and for the buttons at the bottom of the interface, please see the 'Common interface elements' page.
Parameters
General quicktab

Emitter
For objects to be generated from particles, you must tell the Generator which emitter it will work with. Drag an emitter object into this field to do that. Until you have done so, you will not be able to access any of the other settings in the Generator.
Add Emitter
Click this button to create a new emitter and add it to the 'Emitter' link field.
Objects From Particle Birth
If this switch is checked, an object will be generated for each particle as soon as it is created. If it is unchecked, no object will be generated for newly-created particles until this switch is checked again, or until object generation for a particle is turned on by an Action.
You should normally leave this switch checked unless you are sure you want to turn it off.
Use Multiple Child Objects
This setting determines how the generator will deal with more than one child object. The drop-down menu has five settings:
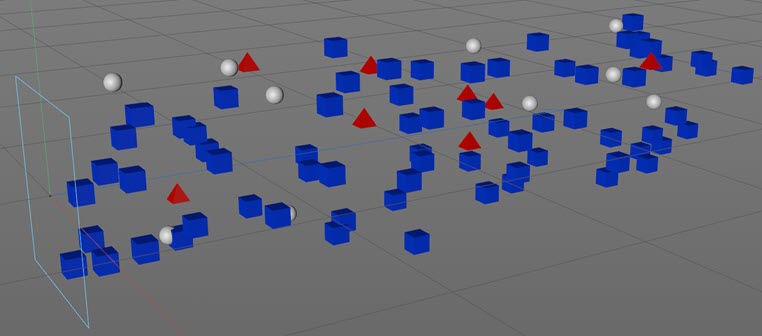
- Sequentially [default setting]: for each particle the Generator will generate one of its child objects in turn. In other words, if you have a Generator with three child objects - a cube, a sphere, and a cone - the first particle will generate a cube, the second a sphere, the third a cone, the fourth a cube again, and so on.
- Randomly: for each particle the Generator will choose one of the child objects at random.
- First Child Only: the Generator will ignore other child objects and just generate the first valid child.
- Choose by Index: in this mode, you can choose which child object is to be generated. The first valid child is given the index of 1, the second is 2, and so on. This may not appear to be a very useful mode, but the great advantage is that you can change the object generated with an Action, so when a particle satisfies the required criteria it can be made to generate a different object.
- Assign by Group: child objects are assigned to each particle according to the particle's group. For example, group 1 particles are associated with the first child object of the generator, group 2 particles with the second child object, etc.
- Use Gradient: with this option the 'Object Distribution' gradient is available and you can use that to control the distribution of objects.
Index of Child Object to Generate
This is only available if you select 'Choose by index' from the 'Use multiple child objects' drop-down. It's up to you to make sure the index is valid. If the Generator only has two child object and you enter a '3' here, nothing will be generated.
Random Seed
The seed value for the random selection of objects when you select 'Randomly' from 'Use Multiple Child Objects'.
Object Distribution
 This is a gradient which becomes available if 'Use Multiple Child Objects' is set to 'Use Gradient'. It has no effect if the Generator only has one child object.
To use this gradient the colours are not used at all. It is the position of any knots that is important. For example, suppose you have three child objects arranged like this in the object manager:
To control the distribution you would need a gradient with two knots, like so:

The two knots are set at 10% and 90% along the gradient. In this case, the first and third child objects would each make up 10% of the total and the second child object would make up the remaining 80%, giving this result:
Clone Type
This drop-down lets you choose how the clones of the child objects are generated. 'Duplicate' generates full copies, as if you duplicated the object in the object manager. 'Instances' generates Cinema 4D instances, while 'Render Instances' generates, well, render instances. Details of instances and render instances can be found in the Cinema 4D documentation.
Note that there is a small issue if you select render instances. In this case the source object which will be cloned will remain visible in the scene and will be rendered. This is due to internal workings of Cinema 4D. A simple workaround is to position the source object off screen in such a position that it will never appear in the rendered image.
Draw Mode
This determines what the Generator shows in the editor and at render time. It has four settings:
Geometry Only
This will turn off the editor display of the particles. This is because it can be distracting to see the particles and objects in the editor at the same time, especially in wireframe views.
Particles Only
Geometry will not be displayed and only the particles are shown. This is very useful if you are caching a scene which generates a lot of geometry. Because Cinema is quite slow in drawing multiple objects on screen, caching a lot of particles with geometry is also slow, as the geometry is shown in the editor. You can use this setting to generate the cache, then reset the drop-down menu to one that produces geometry before you render the cached scene.
Geometry and Particles
Both objects and particles are displayed.
Geometry on Render Only
With this setting, geometry will not be generated in the editor (so speeding up the viewport) but will automatically be generated when rendering to the picture viewer. This is a convenience setting so you don't have to remember to switch object generation on and off when creating a scene or rendering it.
Caution: if you select this option, then cache the scene, no geometry will be rendered in the picture viewer. This is because the generator will be cached when it is not producing any geometry, so nothing will be rendered. There are two solutions to this:
- don't cache the generator (turn generators off in the cache object's 'Inclusion' tab, or drop the generator into the 'Exclude' list)
- use an option other than 'Geometry on Render Only'
Update on Frame Change Only
This switch was added to prevent the Generator from constantly refreshing the generated objects even when nothing in them had changed. This is due to Cinema 4D asking for them to be refreshed for reasons which have nothing to do with X-Particles. This causes a problem in renderers which feature a real-time preview render, as the preview window itself is repeatedly having to be re-rendered.
If this switch is on, the Generator will only rebuild the generated objects when the current frame changes. So for example, if you have a primitive sphere as a generated object, and you change the number of segments in the sphere, that change will not appear in the editor until either you hit the 'A' key to force a redraw of the editor view, or advance the animation by one frame. (Note that this is the same behaviour that you see in the MoGraph Cloner.) By contrast, if the switch is off, you would see an immediate change.
The switch is on by default, but if you turn it off, the Generator behaves exactly as it would in previous versions.
Animate
Suppose you are generating a sphere whose radius is keyframed to increase from 0 to 100 over a number of frames. If 'Animate' is checked, when a new sphere is generated its initial radius will be 0 and will increase to 100 as the particle gets older. If 'Animate' is off, then for a new sphere generated at (for example) frame 30, it will have the radius of the original sphere at 30 frames. Normally you would leave this switch on but it can be turned off if desired.
Note: for this to work the object must be animated using PLA animation. Using deformers or expressions such as the Pose Morph tag will not work. This is a limitation of Cinema 4D itself, not of X-Particles.
Scale and Variation
The Scale value determines how fast the object will be animated. For example, if you have an animated bird flapping its wings, a scale of 200% will cause the wings to flap twice as fast as normal. If you add some variation, the objects will be animated at different speeds.
Random Offset and Offset
By default, all animated objects will be animated from the same point in the scene. What this means is that all objects will appear to have the same animation - so birds will all flap their wings in unison, for example. That might be what you want, and if so, you can adjust the starting point by altering the 'Offset' value. Often, however, you will want the objects to be animated from different starting points from each other, which gives a more natural effect. To do this, check the 'Random Offset' switch.
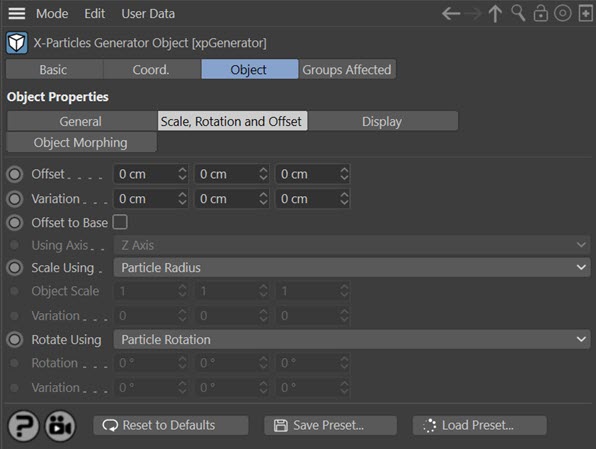
Scale, Rotation and Offset quicktab
Offset and Variation
By default the generated object is given the same position as its source particle. If desired, you can offset the object from the particle using these two parameters.
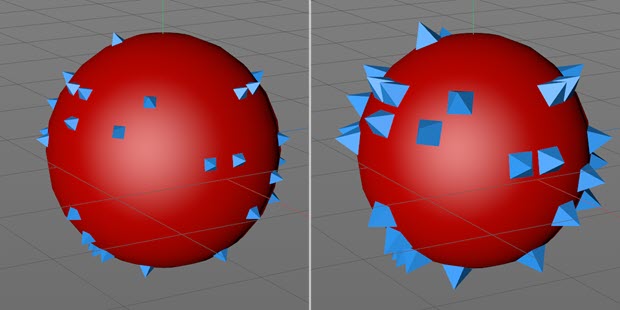
Offset to Base
This option is of most use when emitting from an object. It will try to ensure that the base of the generated object is resting on the emission object rather than being partly buried in it. In this example pyramid objects are emitted from the red sphere. On the left, 'Offset to Base' is off, on the right it is on:
Using Axis
This option is only available if 'Offset to Base' is enabled. It lets you select which is the 'base' of the object. In the example shown the pyramid was oriented along the Z axis, so this option was left at the Z axis. But if the base of the object is along a different axis you can select it here.
Scale Using
The size of the generated objects can be set in one of four ways from this drop-down:
Particle Scale
The scale of the particle will be used to scale the geometry. By default particles have a scale of 1, so with this option the generated object will have the same size as the source object, unless the particle scale is changed.
Particle Radius
This option will scale the object size up or down to match the particle radius.
Important: with this option, the Generator uses the bounding box size of the original object to calculate the generated object's scale. If the bounding box has zero size, the scale will be set to zero. This can be seen with lights, for example, which by default have a scale of 1 on all axes but a size of zero (you can see these values in the Coordinates manager and the Coord. tab of the light object). If you use a Generator object to generate lights therefore, you must choose an option in this menu of something other than 'Particle Radius' to set the scale.
Source Object Scale
The generated object will have the same scale as the source object regardless of the particle scale.
Set Scale
With this option you can set the generated object's scale from the Generator object. Values are given in the 'Object Scale' setting and variation can be added with the 'Variation' setting.
Object Scale and Variation
These are used when the 'Scale Using' parameter is set to 'Set Scale'.
Rotate Using
This drop-down determines how the generated object is rotated. It has three options:
Particle Rotation
The object rotation is set to the rotation of the particle (note: particle rotations MUST be enabled in the emitter for this to work).
Set Rotation
The object rotation can be set from the Generator object using the 'Rotation' and 'Variation' fields.
Source Object Rotation
The generated object will have the same rotation as the source object regardless of the particle rotation.
Offset Particle Rotation
With this setting, the object rotation is set to the rotation of the particle, plus an offset given in the 'Rotation' and 'Variation' fields. (Note: particle rotations MUST be enabled in the emitter for this to work.)
Rotation and Variation
These fields are used when 'Rotate Using' is set to 'Set Rotation' or 'Offset Particle Rotation'.
Display quicktab
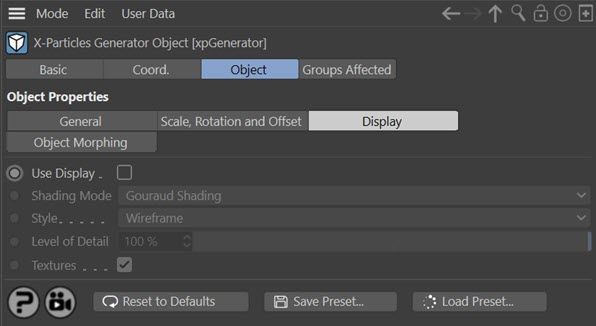
This is a convenience tab to set display modes for the generated objects. It reproduces a subset of the the settings of the Cinema 4D Display tag and more information can be found in the C4D documentation.
Use Display
If unchecked no changes to the object display are made.
Shading Mode
The shading mode, as found in the C4D Display tag.
Style
The style, as found in the C4D Display tag.
Level of Detail
The level of detail in the generated objects. You can reduce this to reduce the displayed polygons in each object, to speed up the simulation. Only the editor display is affected, not the rendered result.
Textures
If this is unchecked, textures on the generated objects are not used in the viewport. They are still used on rendering.
Object Morphing quicktab
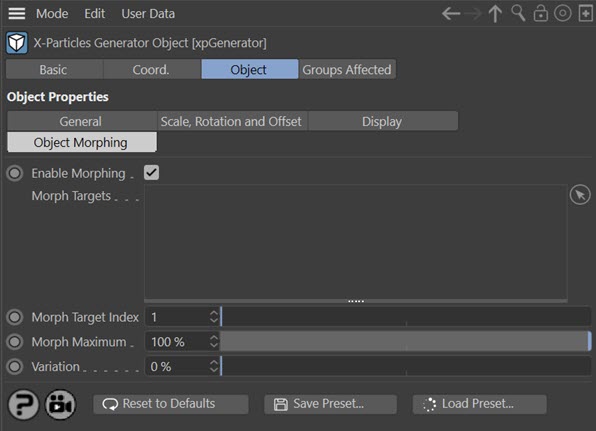
The settings in this section are used to control object morphing. For full details of how they are used, see the 'Morphing objects' page.
Enable Morphing
Uncheck this switch to disable morphing.
Morph Targets
Drag into this list any objects you wish to use as morph targets. Each object MUST also be a child object of the Generator object.
Morph Target Index
The index of the object in the list you wish to morph to. This starts at 1 (the first object in the list). It is up to you to make sure that the index is a sensible one. If you set it to '3' and there are only two morph targets in the list, no morphing will occur.
Morph Maximum
This is the amount of morphing that will take place. Normally this is set to 100% - that is, a complete morph from the initial object to the morph target. But it can be reduced for an incomplete morph if desired.
Variation
This adds some random variation to the 'Morph Maximum' setting so that the generated objects can show different amounts of morphing if desired.