Common Interface Elements in X-Particles
Many objects in X-Particles share certain common elements in the user interface (UI). These are explained here rather than on each object page.
Groups Affected tab
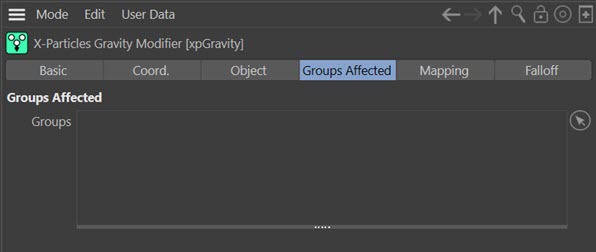
Most objects have this tab. It indicates which particle groups are affected by the object, and contains a list box into which particle groups can be dragged and dropped. The example here is from the Gravity modifier, but the interface is consistent across all objects:

To use the list drag all particle groups to be affected by the object into this list. If there are no groups in the list, all groups are affected by the object.
If you add a group to this list then only particles in that group will be affected by the object. But if you lick the green tick icon to change it to a red cross, the group will no longer be affected.
Group flags
The modifiers Groups list uses flags to alter which groups are affected by the modifier. There are two flags you can use: the hierarchy flag and the on/off flag. These use the same icons as are found in many other lists in Cinema 4D.
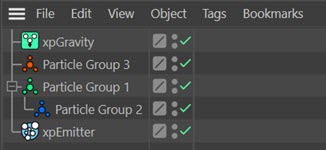
Suppose you have a scene with three groups which looks like this in the Object Manager:

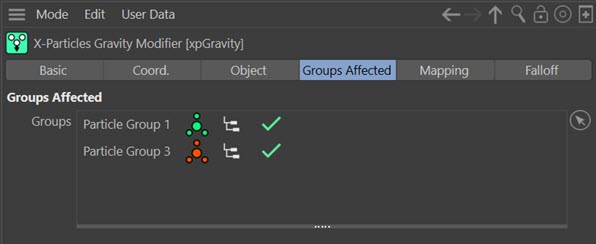
As you see, group 2 is a child object of group 1. Now suppose two of these groups are dragged into the groups list of a modifier:

Each group has two flags. You can temporarily prevent the modifier from affecting any group - or a complete hierarchy - by clicking the on/off flag (a green tick) so it becomes a red cross.
In the above screenshot, all groups in the hierarchy will be affected by the modifier because group 2 is in the same hierarchy as group 1, which is in the groups list. You can stop this behaviour by turning off the hierarchy flag, in which case only the parent group will be affected.
If you change the group 1 icon to a red cross, that group and all the groups in its hierarchy will no longer be affected. The hierarchy switch does not alter this behaviour.
Mapping tab

Most (not all) modifiers have a Mapping tab. By default it is empty but maps can be added by clicking the 'Add' button. For more details, please see the data mapping page in this manual.
Falloff tab
Almost all the modifiers in X-Particles can use a falloff value, and certain other objects also can. Objects which can use a falloff will have a separate falloff tab. The falloffs in this tab are identical to those built in to Cinema 4D, and information on their use can be found in the C4D reference documentation. Fields in Cinema 4D R20 and higher will work in the same way.
X-Particles includes three additional falloffs, a 'Noise' falloff, a 'Shader' falloff and a 'Particles' falloff. See their respective pages for details.
Command Buttons
Almost all objects will have at least one command button at the bottom of the object's UI. Not all objects have all these buttons but the possible buttons are shown here.

 Brings up the manual page for this object.
 Displays the relevant page from the online video manual for this object.
Reset to Defaults: resets the object's settings to their default values.
Save Preset... and Load Preset...: these buttons handle the saving and loading of object presets. For more details on how to use them, please see the main Presets page.