Kill Modifier
The Kill Modifier provides a way to force particles to stay within certain bounds. Those which stray outside the defined boundary will be killed.
Interface
Here is its interface:
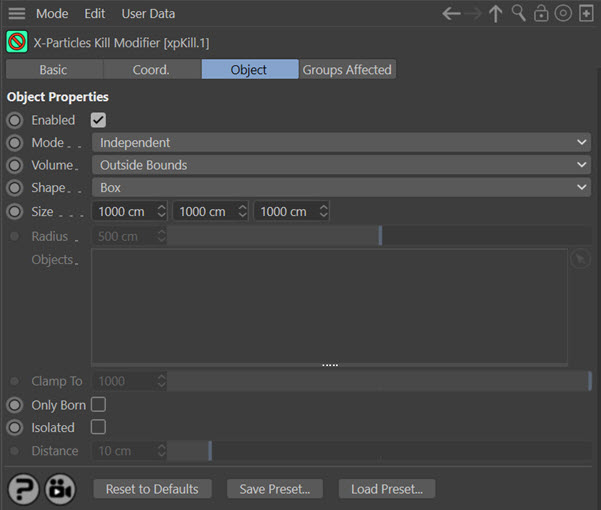
For the 'Groups Affected' tab and for the buttons at the bottom of the interface, please see the 'Common interface elements' page. This modifier does not have a Falloff tab.
Settings
Enabled
Uncheck this switch to disable the modifier.
Mode
Independent [default setting]
In this mode, particles will be affected if they come into the field of effect of the modifier. X-Particle Actions have no effect on the modifier in this mode.
Action-Controlled
In this mode, the modifier will only act on a particle when told to do so by an Action. Until that point, the particle will not be affected, but once activated for a particular particle, the modifier will continue to influence it as long as it is in the field of effect of the modifier. The modifier's effect on a particle can be halted by means of another Action, if desired.
Volume
This defines the nature of the bounding volume.
Inside Bounds
The particles will be killed if they are inside the modifier's boundary (shown as a yellow box or sphere).
Outside Bounds
The particles will be kiiled if they are outside the modifier's boundary (shown as a green box or sphere).
Objects
One or more objects can be dragged into the modifier's Objects list. The effect depends on the flags which are set for each object.
Outside Camera FOV
In this mode particles are killed if they are outside the field of view of the current camera (note: this will only work correctly with Perspective cameras).
Clamp to Max. Particles
With this option, the modifier will remove any particles exceeding the limit you specify. There is no falloff or boundary in this mode as it applies scene-wide to restrict the maximum number of particles for any emitter it affects.
The maximum number of particles permitted is set in the 'Clamp To' parameter.
Shape
The shape of the modifier, either a Box or a Sphere. Only applies when 'Volume' is set to 'Inside Bounds' or 'Outside Bounds'.
Size
The size of the object when 'Shape' is set to 'Box' (not available in Objects or Camera modes).
Radius
The size of the object when 'Shape' is set to 'Sphere' (not available in Objects or Camera modes).
Objects
This is a list of bounding objects. Each object in the list (which must be a polygon object of some kind) has two flags.
Green tick/Red cross
The object will only act as a bounding object if the green tick is present. It is disabled if it has a red cross.
Outside/Inside flag
In this screenshot the Cube has the Outside flag, while the Sphere has the Inside flag:

- The Outside flag means that the particles will die if they are outside the Cube.
- The Inside flag means that the particles will die if they are inside the Sphere.
Clamp To
This is only available if 'Volume' is set to 'Clamp to Max. Particles'. If the total number of particles belonging to an emitter exceeds this value, particles will be removed to bring the number down to this limit.
Only Born
If this switch is checked, only newly-created particles will be killed. This is ideal for positioning an emitter to give an already filled volume and killing all new particles outside the volume on birth.
Isolated
Checking this switch will kill particles which are isolated from other particles. The main purpose of this switch is in fluid simulations, to permit the removal of stray fluid particles. You can set the distance at which a particle is considered to be isolated in the 'Distance' setting.
Distance
Only available if 'Isolated' is checked. It is the distance from other particles at which a particle is considered to be isolated and will be killed.