Particle Deformer
The Particle Deformer links each vertex of an object to a particle. When the particles move, the vertices move with them, deforming the object.
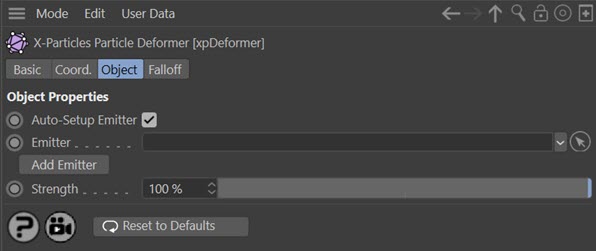
The interface is very simple:
For the 'Falloff' tab and for the 'Reset to Defaults' button, please see the 'Common interface elements' page.
Parameters
Auto-Setup Emitter
If this switch is checked, which it is by default, then when an emitter is dragged into the 'Emitter' link field it will automatically be set up to work with the deformer.
Emitter
The vertices of the object will be linked to particles generated by the emitter in this link field. The particles themselves can in theory be emitted from any emitter type. However, the best results are obtained if they are emitted from the object which is going to be deformed. Otherwise the results are...unpredictable.
Add Emitter
Click this button to create an emitter and add it to the 'Emitter' field.
Strength
The strength of the deformation is given in this parameter. A strength of 0% will result in no deformation. The maximum is 100%, which is full deformation.
Using the deformer
As with any other deformer, the Particle Deformer must be a child of the object to be deformed. Then an emitter must be present in the 'Emitter' link field.
Once you have done that, there are a number of steps to set up in the emitter. You must:
- Set the type of emitter, preferably to Object, and drag the source object into the emitter's Object field. Ideally this should be the object to be deformed, but it doesn't have to be.
- Set 'Emit From' to 'Points' to generate particles from the object's vertices.
- Check (turn on) the switch 'One Particle Per Source Element' in the emitter - this guarantees that one, and only one, particle will be emitted from each vertex in the object each frame (note that this means that the Birthrate setting is ignored since the birthrate now depends on the number of vertices in the object).
- In the Emission tab, turn off 'Emit all Frames' and set the emitter to emit particles in just one frame. You don't have to do this - it won't affect the deformer - but if you don't you will generate far more particles than you actually need, which may slow down playback.
- Now set any other emitter parameters, such as speed, initial direction, and so on. Remember that Birthrate is ignored if you turned on 'Emit One Particle Per Point'.
Using a vertex map
One other thing you can do is add a vertex map to the object to be deformed, then drag it into the 'Selection' field in the emitter's object tab. The deformer will use the vertex weights in the map to determine the strength to apply to the deformation for each point.
Note: it is not sufficient to leave the vertex map on the object (there might be multiple such tags). You must specify which one to use by adding it to to the 'Selection' field.
Setup is now complete and you can play the animation. The effect will depend on particle speed, direction, the effect of modifiers, etc.
That's quite a lot of steps to go through. Fortunately you can avoid most of them by leaving the switch 'Auto-Setup Emitter' turned on. If this is on, steps 1-4 above are carried out for you when you drag an emitter into the 'Emitter' link field.
Notes
Any polygon object or primitive can be deformed in this way, as can any spline. You can also deform other types of object but those which generate multiple objects - such as the Array or Cloner - won't work. You can deform an object in a Subdivision Surface object but you get much better results by emitting particles from the base mesh rather than the Subdivision Surface object itself.
What can you use this for? We'll leave that to your imagination. Suffice to say it's quite fun to play with, even if its actual usefulness is limited!