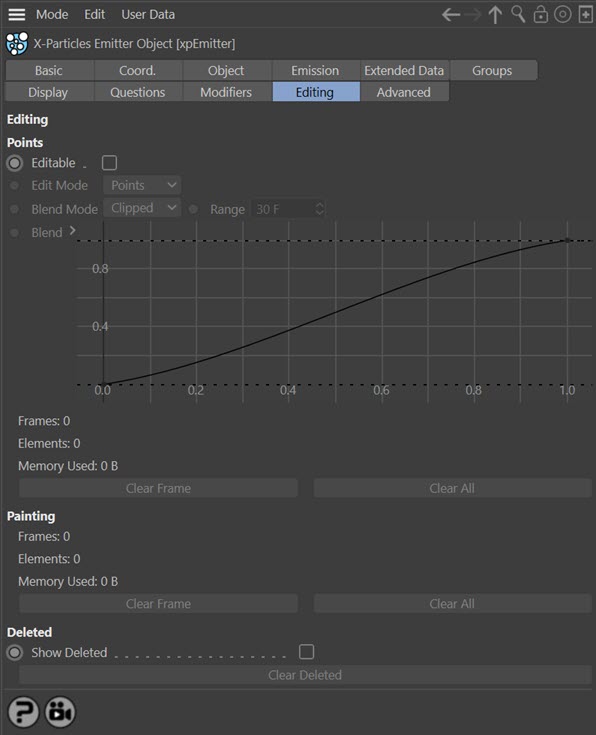
Emitter: Editing Tab
Interface
This tab enables you to select particles then use any point-editing tool, such as move or delete. With this you can, for example, remove stray particles that you don't want.
Here is a brief summary of how to edit particles:
- Play your animation to the frame where you want to start editing, (best is at the end). Note that a keyframe marker will appear in the powerslider to show you where the edit was made. You can edit particles on multiple frames.
- Enable 'Editable' and go into points mode. The particles now become points; you can select, delete, move, reposition etc. them using the live selection, move tool, brush tool, magnet, etc.
- Now play your animation and the particles will reposition themselves to the edited position. They will start to do this a number of frames before the frame in which you made the edit. That number is given in the 'Range' parameter.
- Note that if you delete any particles they will be gone from the start of the animation.
- It is also possible to use Cinema's Set Selection commands on edited particles.
- Setting 'Range' to a longer duration will make the particles start repositioning earlier.
- The Blend spline works like a ease in and out based on the Range value. This prevents an abrupt transition to the edited state.
Note: if you are using Cinema 4D R20 or higher, it is not possible to delete editable particles. MAXON changed the SDK in R20 and above which has made deletion fail. Unfortunately therefore, in R20 and later versions deleting particles will not work.

Parameters
Editable
Check this switch to make particles editable.
This setting is extremely useful. If you enable it, you can use the emitter as the object to clone onto in the Mograph Cloner. In the Cloner, set 'Mode' to 'Object', then drag the emitter (with this switch turned on) into the 'Object' field. Then also in the Cloner, change 'Distribution' to 'Vertex'. The Cloner will now clone objects onto the particles.
If you use Cinema 4D R20, you can use the emitter directly as a source object in the Volume Builder object. Turn on this switch in the emitter, then drag the emitter into the 'Objects' list of the Volume Builder. Finally, select the emitter in the Objects list and turn on the 'Use Mesh Points' switch in the Volume Builder. This will create a volume directly from the particles.
Edit Mode
This drop-down has two settings:
Points
Particles are edited as points for the current frame.
Path
Edits the particles' path to the current frame as spline points.
Blend mode
It is possible to edit particles on more than one frame. This drop-down determines how the emitter will blend between edited data on different frames. It has two settings:
Clipped
The emitter will blend between edited frames.
Mixed
The emitter will mix the blend Ranges of multiple frames.
Range
The number of frames before a frame containing edited data when the transition to the edited state begins.
Blend
This spline determines how the particles will move to their edited state. It can be used to give smooth transitions or more abrupt ones.
Clear Frame
If you move to an edited frame, then click this button, the edited data on this frame only will be removed. How do you know where you made the edit? A keyframe marker will appear in the powerslider when you edit particles on that frame.
Clear All
Removes editing data on all frames.
Painting
This section is used to display information for particles which have been painted using the Particle Paint tool.
Frames
The number of frames containing painted particles.
Elements
The number of particles painted on the current frame. This will be updated as you move through the timeline.
Memory Used
The amount of memory used for painted particles on the current frame.
Clear Frame
Delete painted particles from this frame (you will need to rewind the scene and play forward to see the result).
Clear All
Delete all painted particles from this emitter (you will need to rewind the scene and play forward to see the result)..
Deleted
Show Deleted
If particles were deleted, checking this switch will make them visible and highlight which were marked as deleted. This can be combined with the Particle Paint tool to undelete particles you have removed.
Clear Deleted
If particles have been deleted by editing, clicking this button will clear the deletion - that is, when you play the animation again, the deleted particles are restored.