Network Modifier
This modifier will cause the particles to move in a network or gridlike manner.
Interface
This modifier has two modes of operation, which are:
In addition there are several parameters which are common to both modes and another quicktab which contains the intersection settings.
For the 'Groups Affected', 'Mapping', and 'Falloff' tabs, and for the buttons at the bottom of the interface, please see the 'Common interface elements' page.
Parameters
Common settings

These parameters are common to both 'Operation' options.
Enabled
Uncheck this switch to disable the modifier.
Mode
Independent [default setting]
In this mode, the modifier will work in the same way as a standard Cinema 4D particle modifier: particles will be affected if they come into the field of effect of the modifier. X-Particle Actions have no effect on the modifier in this mode.
Action-Controlled
In this mode, the modifier will only act on a particle when told to do so by an Action. Until that point, the particle will not be affected, but once activated for a particular particle, the modifier will continue to influence it as long as it is in the field of effect of the modifier. The modifier's effect on a particle can be halted by means of another Action, if desired.
Operation
The Network modifier can operate in one of two modes, selectable from this drop-down:
Standard
The usual mode of operation, with particles outside of a closed object.
Inside Volume
In this mode, the particles stay inside a closed polygon object. More about this mode can be found below.
Change Mode
With this menu you can select which criteria determine when the particle changes direction. The options are:
Time
The change in direction occurs when the time given in 'Change In' has elapsed.
Distance Travelled
The change in direction occurs when the particle has travelled the distance give in the 'Distance' parameter.
Change In and Variation
This determines how often the particle will change direction. It relates to the particle age, not the actual frame number of the animation. For example, if set to 10 frames, each particle will change direction when it is 10, 20, 30, etc. frames old. However, this setting is also affected by the threshold settings (see below).
A random element can be introduced by using the 'Variation' setting.
Distance and Variation
The particle will change direction when it has travelled at least the distance given in 'Distance' since its last direction change.
A random element can be introduced by using the 'Variation' setting.
Standard operation

These parameters are used when 'Operation' is set to 'Standard'.
Plane
This parameter lets you restrict the change in direction to a specific plane. The options are:
Any
The particle will move in all 3 planes.
XY, YZ, XZ
Particle movement is restricted to the selected plane.
Important: see the section 'Effect of Emitter Rotation' below for a discussion of how to solve problems with the Plane setting apparently not working correctly.
Change Direction
This drop-down governs how the particle changes direction. It has three options:
Positive/Negative
When the direction changes, it will change by randomly choosing either to add or subtract the change angle to the heading and/or pitch.
Positive Only
The direction change will always add the change angle to the heading and/or pitch.
Negative Only
The direction change will always subtract the change angle from the heading and/or pitch.
Change Angle (Heading) and Change Angle (Pitch)
This is the angle by which the particle will change direction. The default is 90 degrees, so the particle will change direction by a right angle on heading and pitch.
A random element can be introduced to either heading and/or pitch by using the appropriate 'Variation' settings.
Heading Threshold and Pitch Threshold
In order to reduce the regularity of the changes in direction, the modifier will generate a random value between 0 and 100%. If this value falls below the threshold value, a direction change will not occur. This adds a degree of randomness to the changes in direction.
Note that if these values are set to 0%, a change in direction will always occur; if set to 100%, it will never occur.
For an interesting hexagonal effect, try setting the 'Change Angle (Heading)' to 60 degrees, set the 'Heading Threshold' to 0% and the 'Pitch Threshold' to 100%. Turn off sub-frame emission in the emitter, reduce the emitter size to zero, attach a Trail object to the emitter and play the animation.
Falloff Affects
This setting determines how the modifier's falloff will affect the change in direction. It has four settings:
Threshold
The two 'Threshold' values will be altered by the falloff.
Angle
The two 'Change Angle' values will be affected by the falloff.
Both
Both Threshold and Angle values will be affected by the falloff.
Neither
The falloff has no effect on either the Threshold or Angle values.
Constrain Axis
In previous versions of X-Particles, the Network modifier took control of the particle direction, and any attempt to change that direction usually resulted in a mess. For example, consider the result if an Attractor modifier was added to the scene and its position animated:
This is not of much use. By using this parameter however, the direction change can be constrained to orthographic movement to a greater or lesser degree. With this parameter set to 100%, the above animation looks like this:
The parameter is a percentage setting from zero (in which it has no effect and the result is as shown in the first video above) to 100%. In between those values the change in direction will be less marked.
Important: if you use this feature, the Network modifier MUST be the last modifier to be executed, that is, the last one shown in the object manager. If you don't do this, the feature will not work, as the correction to the particle direction must be applied after all other direction changes have been made.
Inside Volume operation
These parameters are used when 'Operation' is set to 'Inside Volume'.
In this mode, the particles remain within a closed polygon object. This will cause the particles to bounce off the inside of the object, creating a grid inside it. To set this up correctly you need:
- an object which is a single, closed object, either an editable polygon object or an object primitive
- an emitter placed inside the object's volume
- a Network modifier with the 'Operation' set to 'Inside 'Volume'
If this mode is selected, the interface changes slightly:

Object
Drag the object to be used into this field. Make sure you place the emitter inside this object.
Always Orthogonal
In this mode, the direction changes are always in 90 degree steps - there is no choice over the direction change angle. However, when emitted a particle may not be travelling along an orthogonal plane - for example, when emitted from a spherical emitter the direction is random. The modifier will force the particle to travel orthogonally as soon as it collides with the object interior. If this switch is checked the particles will travel orthogonally as soon as they are emitted.
In general it is recommended that you leave this switch checked, otherwise you may end up with something of a mess. But if you want the particles to travel in a random direction until the first collision, uncheck this switch.
Important: if this switch is unchecked, one effect is that the networking will not occur UNTIL the particle has collided with the inside of the mesh. This means that if a collision never occurs, there will be no network effect.
Volume Space
What do we mean by 'travel orthogonally'? It means that the particles will always travel parallel to one of the three axis planes - XY, XZ, or YZ. But the axis could mean either the 3D world axis, or the axis of the object. This drop-down enables you to choose:
Global
The axis planes are always those of the 3D world, regardless of how the object itself is rotated.
Local
The axis planes are those of the object, so if the object is rotated, the particles will travel parallel to its axis planes and not those of the 3D world.
Offset
Using an offset greater than zero will leave a gap between the particles and the object's polygons, effectively shrinking the inside volume.
Check Is Inside
This switch forces the modifier to check if a particle really is inside the object before changing direction. If you place the emitter inside a closed object, and neither the emitter or the object move, then you don't need to use this switch. But if, for example, the emitter is initially outside the object, the particles can never enter it and bounce around inside - they will always bounce back off the outside of the object.
Turning this switch on will cause the particle not to bounce off the object if it is outside. Then it can enter the object, at which point it will bounce and remain inside.
Intersection Settings
 It is possible for the modifier to detect a possible intersection with the particle's own trail, assuming it has one, and try to change direction to avoid the intersection. The settings are contained in this quicktab:

Check Intersections
Check this switch to enable intersection checking.
Detection Distance
This is the distance in scene units at which the particle will detect that there is a trail to be avoided. The shorter this distance, the closer the particle will get to the trail before changing direction to avoid the object. If you set this too low (e.g. less than the distance the particle will travel in one frame), the particle may fail to avoid the trail altogether.
Default Thickness
This setting has two uses. Since the trail object is a spline, this is the 'thickness' given to the trail. A spline has zero thickness, so there is nothing to collide with; in that case, the spline has to be given an assumed thickness (imagine a virtual cylinder around the spline) to provide a collision object.
In this modifier this object is always an X-Particles Trail object, as opposed to a conventional spine. Therefore, its thickness comes from the 'Thickness and Color' tab of the Trail object. That tab can do three things:
- the default is that the thickness is not set, in which case it is given a default value of 0.5 scene units and this modifier's 'Default Thickness' setting is ignored
- the thickness is specifically set, in which case this setting is again ignored
- or the 'No Thickness or Color Data' switch is checked, in which case no thickness data at all is provided by the Trail object and this setting provides the thickness value
But it has another use. When a particle is trying to avoid its own Trail object, the problem is that the trail has the virtual 'cylinder' around it. This means that if you test for intersections from the particle position, it will hit the cylinder around itself and register an instant hit, which is clearly incorrect. If it tries to change direction at that point, it won't be able to because the 'cylinder' completely surrounds it, so it fails to determine a suitable new direction and simply stops. The only way around this is to advance the starting position along its direction of travel until the starting position is 'outside' the virtual cylinder.
But how far should it be advanced? An arbitrary value won't work, since the trail thickness could be set to any value. Instead the 'Default Thickness' value is used. This will advance the start position of the ray by that distance along the direction of travel,
In this case we strongly recommend that you check the switch 'No Thickness or Color Data' in the Trail object. This will then ignore all thickness data from the Trail object and use only the value in this setting. This will let you understand more clearly what is happening.
Max. Tries
If the particle is to change direction on detecting a possible intersection, it tries a series of random directions until it finds a new one which will not cause an intersection. If it cannot find a suitable direction, the particle will freeze in place.
Sometimes you may see a particle freeze even if there is visibly a possible direction for it. If that happens, try increasing this value, which will increase the number of times the modifier will try to find a new direction. You can also reduce this value to speed up the modifier, but that risks particles not being able to find a suitable new direction.
On Intersection
This menu enables you to choose what the particle will do when it detects a possible collision with a Trail object from the 'Trails' list. There are four possible options:
Change Direction
The particle will change direction to avoid the trail.
Freeze
The particle will freeze. It can be unfrozen again using an Action or the Negate modifier.
Die
The particle will be killed. Unlike freezing, this cannot be reversed later.
Trigger Actions
The particle will trigger any actions in the 'Actions' list.
For convenience, when you add a 'Trigger Actions' layer, a new action will be created and added to the 'Actions' list.
Using this menu will add the selected option to the 'Layers' list. You can add more than one entry to the 'Layers' list if required, but you can only have one of each type.
Layers
This is the list of options that will be carried out when a potential collision with a Trail object from the 'Trails' list. It can contain more than one entry. For example, this list will change the particle direction then trigger any actions in the 'Actions' list:
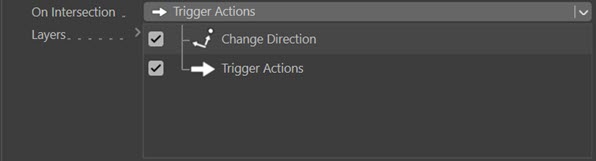
You can remove options by right-clicking an entry and selecting 'Remove' or 'Remove All'. You can also disable any entry temporarily by unchecking the checkbox at the left of the entry, like this, where the 'Change Direction' entry is disabled:

Note that you can only have one entry of the same type.
The order of these entries is not relevant, and in fact, you cannot change the order. They are always carried out in this order, if present in the list:
- direction changes
- particle freezes
- actions are triggered
- particle dies
Trails
Drag the Trail objects you want to avoid intersecting with into this list. Normally you would drag the particle's own Trail object into the list, but you can in fact add trails from other emitters as well. Note that this list will only accept X-Particles Trail objects.
Actions
Drag Actions you want to be triggered on detecting an intersection into this list. The actions will only be triggered if there is a 'Trigger Actions' layer in the 'Layers' list.
Add Action
Click this button to create a new Action and add it to the 'Actions' list. When you click this button, if there is not already a 'Trigger Actions' layer in the list, one will be created. This is simply for convenience, since presumably if you create an action you want it to be triggered.
Effect of Emitter Rotation
The Plane setting is local to the emitter's matrix. What this means is that rotating the emitter will change the direction of the particles even if constrained to a specific plane. This is essential because of restrictions placed on 3D rotations. For example, consider this scene using a Box emitter with the initial direction set to Z+ and the Plane set to XZ:
This is working as expected. Now look what happens if the initial direction is set to Y+:
This happens because the modifier is trying to constrain movement to the XZ directions but as a result has no control over the Y direction - which then remains unchanged and the particles move along that axis.
In this case, the fix is easy - simply change the initial direction in the emitter to Z+ and it will work correctly. But what if we want to emit from an object where this would set the initial direction to Y+, as in this scene:
The particle direction is initially set to be along the polygon normal, which in this case means along Y+. The easiest solution to this is to set the initial direction to be along Z+ in the emitter. But as a more general solution, it is also possible to solve this by rotating the emitter through 90 degrees on the P axis. If you do that, this is the result, but the plane is no longer the global XZ plane but XY (it is still XZ local to the emitter):
To correct that, all we need to do is change the Plane setting to XY:
Which gives the result required. In the end, which method you choose will depend on the scene and what you are trying to achieve, Just remember that if the Plane setting seems to be incorrect or not working, this is inherent in the way 3D rotations are calculated and you can usually resolve the problem by altering the initial particle direction and/or rotating the emitter.