PBD Fluid Object
Brief details on using this object can be found below. See also the Fluid FX object for a second fluid simulator in X-Particles.
Foam is controlled in a separate object, the X-Particles Foam object.
Note that this object governs the behaviour of the fluid; to create a mesh from the particles you will need an OpenVDB Mesher or a Skinner object.
Interface
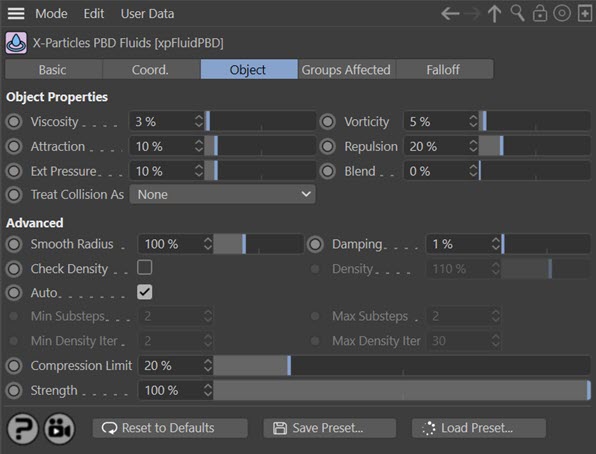
The object's interface looks like this:
For the 'Groups Affected' and 'Falloff' tabs, and for the buttons at the bottom of the interface, please see the 'Common interface elements' page.
Parameters
When considering these parameters, it may be helpful to show short video demonstrations of what they can do. For reference, here is a simple setup with the PBD Fluid object parameters at their defaults:
Viscosity
This sets the fluid simulated viscosity. However, this isn't "true" viscosity, it is an approximation. It adds the velocity influence of the surrounding particles, which gives a more viscous motion. To make a really viscous fluid it might help to add some particle-particle attraction.
You may need to increase this value quite markedly to see significant changes. Here is the reference scene with Viscosity set to 300%:
Vorticity
This increases the curl of the particles motion by adding back in any vorticity already present in the fluid. This will gives a more swirling and turbulent motion. If your fluid needs added vorticity then this can be added using Curl Turbulence (see the Turbulence modifier).
The vorticity in this scene has been increased to 100% and you can see the added turbulence it introduces:
Attraction
This causes this fluid particles to pull together giving an attraction much like surface tension. You might think this leads to a smoother, more coherent particle stream, but in fact it is attracting particles into clumps, causing the stream to break up. This is the effect with attraction set to 25%:
Repulsion
Causes the fluid particles to be push away from each other to force them to spread out more. This can be used to help to reduce particle clumping when only a few particles are close by. In this video repulsion has been increased to 100%:
Ext Pressure
This is a factor applied to the particles to prevent them from breaking up into lots of tiny clumps. The effect is to simulate an increase in surface tension which pulls neighbouring particles together. In this video the pressure has been increased to 100%:
Blend
If you have more than one emitter, representing two different fluid simulations, this setting will mix the particle colour with that of its neighbours, to simulate the effect of liquids mixing. Increase the value to increase the degree of mixing.
Treat Collision As
This menu determines what will happen if collisions occur between particles. It is added for use with the new X-Particles dynamics engine and can be used to generate particle to particle collisions, which normally do not occur within fluids. The options are:
None
The default setting. No collisions are generated. This is the same behaviour as in previous versions of X-Particles.
Different Emitter
Collisions occur between particles from different emitters.
Different Group
Collisions occur between particles from different particle groups.
Smooth Radius
The radius over which the properties of the fluid are smoothed (such as density). When this is reduced the smoothing effect is reduced and the result is more chaotic, as seen in this video where the radius is set to 50%:
Damping
Damping helps to reduce explosive forces. If you simulate a fluid with a density that is very low then the forces trying to keep the density can become very large, if the smoothing radius isn't sufficiently large enough to smooth over enough particles (low density means the particles are spaced further apart, and if this is beyond the smoothing distance it can become unstable). Increasing this setting damps the forces but also reduces motion from the fluid.
The degree of damping required is small. By default it is set to 1%, and older scenes imported into the new version will see this value automatically set to 1%.
Check Density
Fluids are normally incompressible so have a constant density. If this parameter is turned on the density will be checked to ensure consistency in the particle stream. If it is turned off, no check will be applied. The value used in the density check is found in the 'Density' setting.
This setting is off by default. Occasionally (for example, with slow-moving particles on emission) you may need to turn this on,
Density
The value to use when 'Check Density' is on.
Auto
In this version, the PBD fluids have substeps and density calculation iterations, which you can alter from the object itself. If you leave this switch checked, the object will try to determine the optimal settings for substeps and density iterations. But if you are not happy with the automatic settings, you can uncheck this switch and change the values manually.
Min Substeps, Max Substeps
The minimum and maximum number of substeps used in the simulation. These are only available if 'Auto' has been unchecked.
The substeps help with general motion and make the simulation more accurate.
Min Density Iter, Max Density Iter
The minimum and maximum number of iterations used in the density calculations. These are only available if 'Auto' has been unchecked.
The iterations ensure that the particle distribution enforces the fluid density, keeping the fluid volume (as fluids should be incompressible).
Compression Limit
This is the maximum loss of fluid volume in percentage terms. If you increase it, fewer iterations are required but the amount of bouncing and elasticity increases, which may not be desirable. Smaller values require more iterations (so the simulation is slower) but reduces the bouncing/elasticity effect.
Strength
Within a fluid solver there constraints between the fluid particles, controlling the degree to which particles can be moved by the solver. This setting controls the strength of the constraint. If you increase it may reduce the number of iterations required to complete the solve, which would speed up the solution, but could result in instability. If it is decreased it would result in more iterations, so reducing the strength can be useful if the fluids explode during the simulation, as it reduces the force acting on the particles.
Using the PBD Fluid object
PBD Fluids vs. Fluid FX
As you will have noticed, there are two fluid simulation objects in X-Particles - the PBD Fluid object and Fluid FX. Which one should you use and when?
In general, the PBD Fluid object is simpler and often faster. But it is not as realistic. Being essentially a particle modifier it works in a similar fashion to other modifiers and can be used along with other modifiers and dynamics objects, including the Cloth object.
Fluid FX is more realistic but can be slower. It is a solver in its own right, so takes over control of the particles and can't be used with other objects.
If you need large or medium scale fluid simulation, Fluid FX is the better choice. If you need small scale, fast simulation and the loss of realism is less important, choose PBD Fluids.
How to use the PBD Fluid Object
The PBD Fluid object is similar to a particle modifier so you need an emitter to generate the particles.
This means that you can treat the object as you would any other modifier. For example, you can drop the PBD Fluid object into an emitter's include/exclude modifiers list if you need to.
Note that emitting from an object is significantly slower than standard emitters, so should be avoided wherever possible. You can emit from 'solid' emitters such as the sphere, cylinder or box emitters if you need to.
You can use other modifiers in conjunction with this object, such as a Gravity modifier, or other dynamics objects such as the Constraints object. If you want the particles to collide with a an object, use a Collider tag in the usual way. The PBD Fluid object simply governs the behaviour of the particles to make the particle flow seem more fluid-like.