Exporting data from Cinema 4D for import into X-Particles
In this example, we'll use Cinema 4D as the source of data to import into X-Particles and use that to generate some particles. The only reason for choosing Cinema itself as the data source is because it is the one application that all users of XP are certain to own! But the same principles apply for any other application.
Exporting the data from Cinema
To export some data, we can use the Structure Manager in Cinema. Do the following steps to create the data:
- Create a new scene
- Add a primitive sphere
- Make the sphere editable
- Open the Structure Manager (you may need to do this from Cinema's main menu -> Windows -> Structure Manager, if it isn't visible on screen)
You should see something like this:
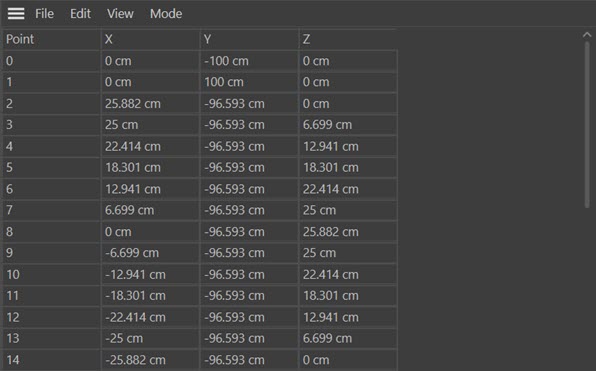
These are the coordinates (in local space) of all the vertices in the object. Now we need to export these so we can reload them into X-Particles.
- In the Structure Manager, File menu, click 'Export ASCII Data...' and when the file selector appears, type the name of the file to create - for example, 'sphere'. Note that the file extension is irrelevant, whatever you give it Cinema will append with 'txt' anyway. That doesn't matter though; XP can cope with any file extension.
If you look at this file in a text editor, you will see that it is not quite a correct CSV file. The first few rows look like this:
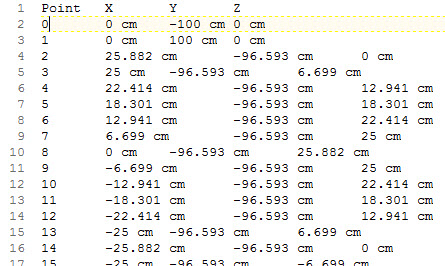
You can see that it has a header row, with four fields, which are the vertex number and the X, Y, and Z vertex coordinates. The delimiter is a tab rather than a comma. But each coordinate is followed by the scene unit, which in this case is 'cm'. This is an odd thing to do but you can, if you wish, turn it off in the Cinema 4D preferences (Units section). Of course, then you will lose every unit display in Cinema until you turn it back on again.
You can, if you wish to, and if you don't like the idea of turning off the units display, use a spreadsheet to remove all those unwanted strings but in fact you don't need to do that. When importing the data the Data Importer will strip out any leading or trailing non-numeric characters leaving only the digits 0-9 and the plus and minus characters.
Importing the exported data into X-Particles
We can now re-import this data into XP. To do this:
- Create a new scene
- Add an emitter and a Data Importer object, and drag the emitter into the 'Emitter' field in the data importer
- Navigate to the file (e.g. 'sphere.txt') which you have just created
- In the data importer, leave the setting 'File Has Header Row' checked, because this file does have such a row
- Also leave 'Get Field Names Automatically' checked, so that the data importer can build a list of field names
- The delimiter in this file is a tab, so change the 'Delimiter' drop-down so that it reads 'Tab'
All the other settings can be left as they are. Now we need to add the data field mappings.
- In the mappings tab, click 'Add Map' three times, as we will need three fields, the X, Y, and Z coordinates of the new particles to be created. We don't need the 'Point' field so we can just ignore that.
- In the first map, the field name drop-down menu will read 'Point' as that was the first field in the file. Change this to 'X' to use the X-coordinate field. Then set the 'Particle Data' drop-down to 'Position: X'. This maps the data field labelled 'X' in the file to the new particle's X-coordinate.
- In the second and third maps the field names should be 'Y' and 'Z' respectively. The data drop-downs should be set to 'Position: Y' to map the 'Y' data field to the Y coordinate in the second map, and 'Position: Z' for the third map.
Loading the data
At this point you can load the actual data by clicking the 'Load Data' button. This will load all the data in the file into memory and keep it there, so you only have to click this once unless you change the data mapping. Whenever you change the mapping - either by adding or deleting maps, or by changing the field names or data drop-down - you MUST reload the data. If you don't, the old data will persist and you won't see any change.
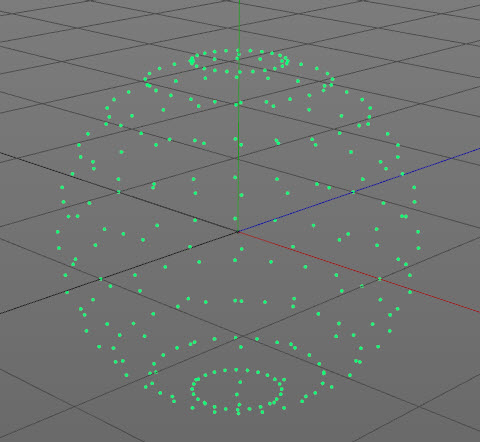
Assuming the data loaded without errors, you can simply hit play on the time slider. A new particle will be created for each vertex exported from the original sphere:
If nothing happens the most likely error is that you didn't set up the maps correctly - the field names may be wrong or you may be mapping the field to the wrong item of particle data.
You will see that the new particles don't move. This is because by default the emitter speed is zero. If this is not done, the particles will be created at the correct location but the emitter will then move them, giving a slight offset to the position. If you want to move the particles after creation a better solution is to add a Speed modifier and use that to move them.
That concludes this example. The next example shows how to export data from X-Particles and back into Cinema.