Using Curl Mode Effectively
This article explains how to use the curl mode in the Branching modifier most effectively, so you understand what each parameter does and why.
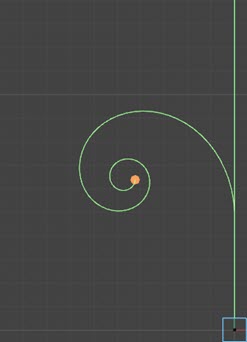
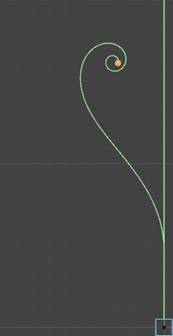
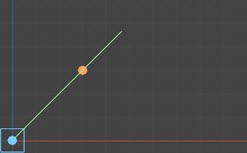
We'll start with a very simple scene: an emitter generating one particle moving along the positive Y axis. The branch modifier in the scene is set to generate just one branch and to avoid confusion the branch deviation settings have been set to zero. The sub-branch object is set to use curl mode with the default settings.
This is what you see (we're only interested in the shape of the curl):
Curl Angle, Tightening, Speed Reduction, and Strength
Let's look at the effect of these settings on the generated curl.
Curl Angle
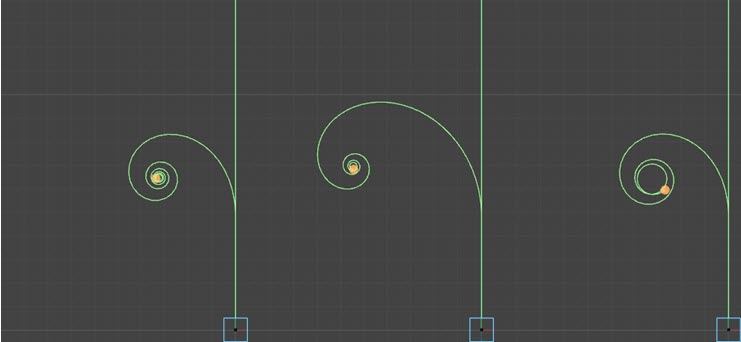
This image shows the effect of the curl angle of 2, 5, and 10 degrees:
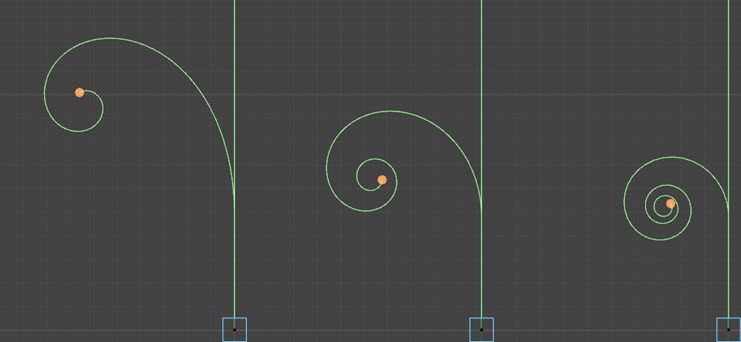
Clearly, increasing the curl angle results in a tighter curl, while reducing it opens the curl out.
Tightening
The 'tightening' value increases the curl angle with time because the value is added to the curl angle each frame. With the curl angle at the default of 5 degrees, here is the effect of tightening at 0.01, 0.5, and 1.0 degrees:
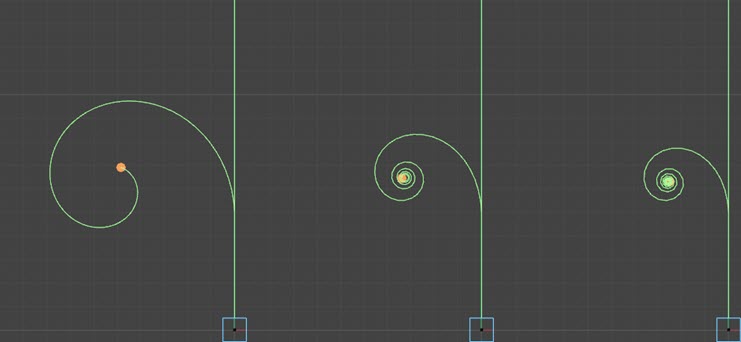
Remember, the tightening value is added to the curl angle value each frame, so the curl angle will get larger and larger and the result is a smaller, tighter spiral. Usually, you would want to keep the tightening value quite low, to avoid the spiral becoming too small. As you increase the tightening value, you see less and less additional effect - in the above image, the increase from 0.01 to 0.5 is much more noticeable than from 0.5 to 1.0.
Speed Reduction
As the curl spiral becomes tighter and tighter, if the particle moved at the same constant speed the effect of the spiral would be greatly reduced. To prevent this the particle speed is reduced by a percentage value each frame. Compare a speed reduction of (from left to right) 0%, 2% (the default) and 5%:
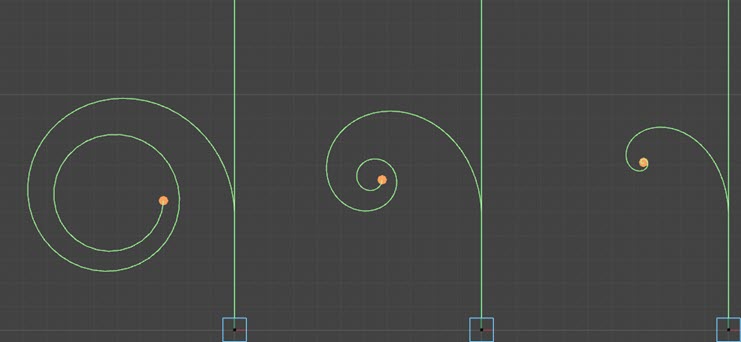
As you see, you need some speed reduction for an attractive spiral but if it is too high the particle may slow so much that it doesn't produce much spiral at all. Which may, of course, be exactly what you want.
Strength
Rather than altering each value individually, you can also simply alter the curl effect by using the Strength setting. Set to zero, this will result in no curling effect.
Control splines
Each of these values (curl angle, tightening, speed reduction and strength) also has an associated control spline. By adjusting these splines you can change how the value varies over the length of the branch.
For example. in this image tightening is set to 0.5 degrees. The default spline (which has no effect on the value) is on the left, in the centre the spline increases the value from zero to maximum over the length of the branch, and on the right it is reversed, decreasing from maximum to zero:
Reversing the curl
The above images all show the curl winding anti-clockwise. But what if you want it to wind clockwise instead? All you need to do is set the curl angle and tightening to negative values, then you will see the same curl but on the opposite side.
What happens if you set the curl angle to a positive value and tightening to negative, or vice-versa? Some interesting results can be obtained, for example, with a curl angle of 5 degrees and a tightening of -0.3 degrees:
Symmetrical curls
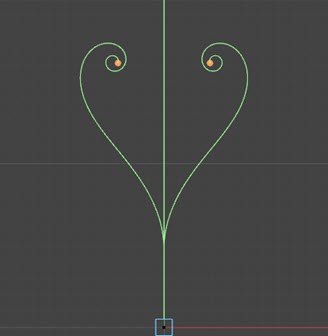
You can have symmetrical curls in the same way as any other branches. Using the same settings as in the above image, but with the symmetrical switch enabled:
Note that if the symmetrical switch is enabled, the state of the fixed plane switch (see below) is ignored, since symmetrical branches must always work in a fixed plane.
Curl Plane Settings
The settings described above are all quite straightforward, but for full use you need to understand the curl plane settings.
What is the curl plane?
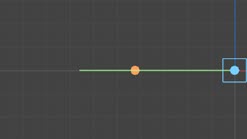
This is the 2D plane in which the curl takes place. For example, going to back to our basic setup but switching to the Top viewport, we see this, showing that the curl occurs in one 2D plane:
Use plane angle
This switch is enabled by default and will force the modifier to use the plane angle. It is recommended that you leave this switch enabled. If you turn it off, you may get some interesting results but you may find that they are undesirable, because the plane will then be governed by the initial direction of the particle, and the curl will vary depending on the initial direction.
Plane angle
The above image simply shows that the branch lies in one plane. As you can see, in this case the branch is created along the negative X-axis, but it doesn't have to be. The plane it lies in can be changed with the plane angle and is also dependent on the plane of the parent branch. So here, the plane angle is set to 135 degrees:
The curl still lies in one plane, but now it is a different plane due to the altered plane angle. You can change the angle to anything you like, and can introduce some variation between branches with the variation setting.
If you are emitting more than one branch (i.e. the 'Number of Branches' setting is greater than one) and the branching is NOT symmetrical, the plane angle will be the same for all the branches. The branches will therefore be superimposed, and it will look as if only one branch has been generated. To fix this, use the plane angle variation setting, and then the plane angle will be different for each branch.
If you are emitting more than one branch and the branching IS symmetrical, only the first of the symmetrical branches will take its plane angle from this setting. All the other branches will be given a plane angle derived from that initial value in order to ensure they are symmetrical.
You can keyframe this setting to make the curl branches emerge from their parent in a spiral. This simple animation shows branching every 10 frames with the plane angle keyframed from 0 to 360 degrees over the scene length:
Note that the branch rotation settings are ignored if the mode is set to curl. If you want to rotate the branches around their stem in curl mode, change the plane angle over time.
The result of an animation like this depends on whether the fixed plane switch is checked or not.
Fixed plane
If the fixed plane switch is checked, which is the default setting, the curl plane is calculated once, when the branch is generated. If is unchecked the curl plane is recalculated each frame. This has a profound effect on the result.
If the plane angle does not change, turning off the fixed plane has no effect. But if it does change over time, the plane will change too. Contrast this image with the Top viewport image above. In this case the plane angle has been keyframed from 0 to 45 degrees over the life of the branch and the fixed plane turned off:
You can see that the curl is definitely not all in the same plane. Results like this may be very desirable, depending on what you are trying to do, but it is recommended that initially you leave fixed plane enabled until you are confident about what will happen if you turn it off.
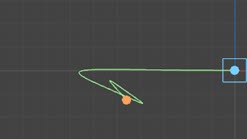
The same scene from the animation above, but with fixed plane turned off, looks like this:
This looks rather unattractive, although it actually looks much better in the perspective view rather than the top view. But it does demonstrate that using a fixed plane is usually very desirable.
As mentioned above, this switch is ignored if the symmetrical switch in the branch modifier has been turned on. Symmetrical branches must operate in a fixed plane in order to remain symmetrical, so in this case the state of this switch has no effect (it is assumed to be turned on).
Summary
There are some simple guidelines for using curl mode that we can produce from the above discussion. They are as follows:
- It is strongly recommended that 'use curl plane' is always on; if it is turned off, the results can be interesting but not easy to predict.
- The rotation settings in the branching section are ignored in curl mode, to rotate branches around a stem in this mode use the plane angle.
- To make a branch curl clockwise instead of anticlockwise, change the curl angle and tightening to negative values.
- The curl angle and tightening are by default the same sign; interesting results can be obtained with positive angle and negative tightening, or vice versa,
- It is recommended that the maximum and minimum branch deviation settings are set to zero. You can use non-zero values but deciding why a branch is doing what it is may be difficult when you are adjusting a lot of other settings at the same time. You can alter the deviation values, if desired, once you have got the curl looking as you want it.
- The fixed plane switch is not relevant if branches are set to be symmetrical (a fixed plane is always used).
- If symmetrical branching is enabled, the plane angle and plane variation is used to set the initial plane (e.g. if three branches are created the first has a plane set from the plane angle and variation, but the other branches emitted with it use plane values derived from the first branch values).
- If symmetrical is not enabled, the fixed plane is important – it constrains the curl to one plane; if it is unchecked the plane angle may vary between frames resulting in unwinding of the curl.
- If symmetrical is not enabled, and the number of branches is greater than one, the plane angle will be the same for each branch in the set; to avoid this, use the plane angle variation.